1950 Farmall Cub Refresh

This weekend I was able to make a little more progress. I was on my own this time as the girls were decorating Christmas cookies.

I started off with cleaning, priming and painting the hydraulic and throttle levers.
painted levers.jpg

Then the I started on the real fun for the day.

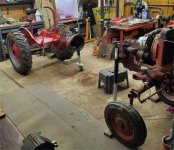
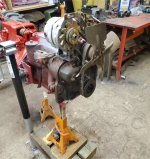
After getting my splitting jacks in place, I proceeded with splitting the tractor.
ready to split.jpg
split in two.jpg
The bolted on caster on one of the jacks worked out really well. Don't forget the all too important axle wedges. With only supporting the engine on one side, these are critical to a successful split.

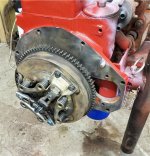
Before I even started this project, I knew someone has been in the engine before. The oil pan gasket has some lovely blue RTV on both sides. What I found on with the flywheel bolts has me scratching my head. Only one of the four bolts has a lock washer on it. When I look at the parts manual, a lock washer is not specified.
flywheel bolts.jpg
parts diagram.jpg

Is there suppose to be lock washers under the flywheel bolts? The reason I ask, I wonder when you bought flywheel bolts from the dealer, would the lock washers have come with them because they were special in some way and would not be called out in the manual because they fell under the same part number as the bolts?

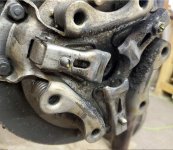
The reason I needed to split the tractor was that the rear main leaked and that I found two of the clutch jam nuts on the inspection cover. The seal is on it's way to TST for rework.
 

Attachments

  • clutch missing nuts.jpg
    clutch missing nuts.jpg
    173.6 KB · Views: 2,665
While we wait for the seal to be reworked, it is a good thing my girls like getting their hands dirty. We have a lot to clean up before we are ready to put the halves back together.
back half after split.jpg

We have a thick coat of oily sludge in the bellhousing. Now I know what the girls can do over Christmas break to stay busy.
 
The girls and I where able to get a bit done on the Cub over the Christmas break. While the Rear Main Seal was being reworked by TST, we cleaned up the bellhousing and chased the threads in the crankshaft and on the engine.

girls cleaning split.jpg
haylee dirty.jpg
clean bellhousing.jpg

Once we received the newly fitted Rear Seal and following TST's guidance for installing it, we proceed with installing the clutch and adjusting the fingers to the 1.25" as shown in the how-to: viewtopic.php?f=141&t=6994.

To avoid the problem of having the jam nuts fall off again, I used blue locktite to help hold them in place.
installed clutch.jpg

With everything clean, a reinstalled Rear Seal, new Oil Pan Gasket and a reinstalled clutch, we managed to get the tractor put back together.
joined tractor.jpg
 
I was also able to get the Hydraulic block all cleaned up and painted. I took Dale's advice and ordered a new O-ring for the control valve. There was plenty of grime built up and now is the best time to get at it. The nice surprise is both of the leather boots are in excellent condition and I can reuse them. After giving them a good bath both in the parts cleaner and again in the sink using dish soap, they cleaned up fairly well.

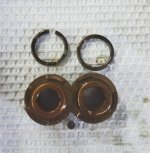
I did have a surprise when I dug into the hydraulic pump to replace the driveshaft o-ring. One of the internal o-rings was missing chunk.
hydraulic pump o-ring.jpg

So a quick order to TM Tractor for a full rebuild kit helped fix this problem. In doing some research about the pump in the archives, I found several posts about using an X-ring to replace the O-ring on the driveshaft with positive results. I kind of liked this solution because it is essentially a poor man's lip seal.
x-ring.jpg

The only problem was that in order to get one in a reasonable amount of time, I had to order 89 of them. I did find another place where I could get only 5, but for a few extra dollar's I could get 89. So needless to say, I have 88 spare X-ring seals. If anyone would like to try an X-ring to fix their leaky hydraulic pump, let me know.

Fortunately the order from TM came fairly quickly, so we got the pump rebuilt, painted and reinstalled. Next time we get out into the shop, we will put the hydraulic block arms and control valve back on and reinstall it back onto the tractor.
 
I seem to rebuild a few of those pumps, and would be happy to buy a couple of those x-rings, if your offer still holds! I had considered trying them...just hadn't gotten around to getting any. Are they compatible with the hydraulic fluid?
 
I wasn't able to get much time in the shop this weekend. But got enough to where I could get the hydraulic system reinstalled.

With everything painted, the original leather boots cleaned and new o-ring for the control valve, we are ready to go.
ready for reassembly.jpg

First up was installing the new o-ring on the control valve and installing the control valve with the leather boot. I also installed the leather boot on the piston rod. Boots look pretty good for using the parts washer and then some dish soap for cleaning.
clean installed boots.jpg

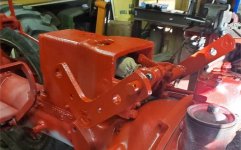
Once I got the arms back on and everything connected again, I put the block back on the tractor.
installed block.jpg

With the pump rebuilt, painted and reinstalled,
installed pump.jpg

I reinstalled the tubes and the control linkage to the lever.
reinstalled system.jpg

I just need to add some hytran and the Hydraulic System is done.

Next up on the TO-DO list, fabricate a new bracket for the alternator. The bracket that came with it, had the alternator hitting the hood. At least they didn't cut the hood for clearance.
 
After you fill the TC Block, leave the fill plug open. Since your piston is extended at this time, start the engine and operate the TC Lever several times to expell any air in the system. Then set the piston fully retracted and shut the engine down. NOW top off the block, if needed.
 
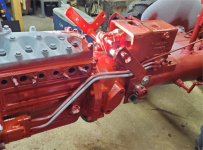
This weekend I was able to fabricate a mounting bracket for the alternator. When I bought the tractor it was already converted to 12v. However the bracket that was installed holding the alternator allowed the alternator to hit the hood. Fortunately, they did not cut the hood. A few weeks ago I bought the NAPA 213-4011 SW alternator.

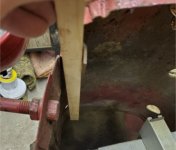
To get started, I needed to know where the edge of the hood is going to be. So I found a scrap piece of wood that conservatively represented the gap between hood hanger and the side of the hood.
hood gap check.jpg

With this, I used some welding magnets to hold the spacer on the radiator shields.
alternator space gauge.jpg

With a little trail fitting and a lot of double measuring, I ended up with this mounting bracket. I had to make the Aft end of the bracket a little thicker so the front end would clear the governor.
alternator mount.jpg
Due to the mounting bolts, I had to place one of the alternator lugs between the bolts. I will find some sort of spacer to fill the gap.

With the alternator mount installed, time for the tightening bracket. This was a little easier to figure out. I was able to cut the original bracket in two, then add a little extra material and put the two pieces at an angle relative to each other.
Alternator bracket.jpg

I will need to add a spacer on this bracket as well.
alternator bracket spacer.jpg

Once everything was done and bolted into place, I had the alternator mounted, using the belt that came with the tractor, NAPA 4L210 and having plenty of clearance to the hood.
View attachment 3
 
With the alternator bracket out of the way. It was time for the second tractor split. This time we will be taking the front axle and bolster off. This will allow better access to cleaning and painting the front of the engine.

We started off by taking the tie rods off and then dropping the axle.
Remove tie rods.jpg

Once the axle was off we removed the steering housing. This revealed the lovely grease that was used as the lubricant. I was not surprised to find this as there was a grease fitting installed on the fill port. The daughters will have fun cleaning this up.
steering grease.jpg

Now it was time for the bolster to come off.
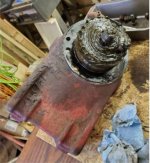
bolster on bench.jpg

Now we have plenty of access to the front of the engine.
tractor spit again.jpg

When the outside temp gets above freezing again, we plan on flushing the engine's water jacket.

Before closing shop for the night, we thought we would chase some threads. Only one problem, there is not enough room to get a tap in the Air Cleaner mount holes with the engine's front coverplate installed. To solve this problem, I taught my daughter how to make a thread chaser by cutting a slot in the end of a bolt. Worked like a charm and the threads are now clean.
thread chasing air cleaner.jpg

We now have a pretty decent pile of parts that need cleaning, priming and painting. As far as I know, the only repairs that need to be made is removing 3 broken screws from the bolster that holds the dogleg panels and reworking/installing the radiator overflow tube. The steering housing will also receive all new gaskets and seals when we go back together.

With the tractor being split for the second time, it feels like we are over the hump and can see the end.
 
I have been following this thread since the beginning, but haven't gone back to review all the things you have already done. So if you already covered this, just ignore... :D

While you have the front off, you have access to the hard-to-access governor lever, so now is the time to ensure the spring is good (replace NOW if not), the lever moves freely, and there is no slop in the gov rockshaft or the linkage across to the carb rod. Oil the fan, too!

Being female myself, I just LOVE seeing your daughter's participating! Even if they never work on a project like this again in the future, the knowledge and self confidence acquired will always stay with them!
My congratulations to them!! (and you, too!) :hattip:
 
Your alternator bracket looks very familiar, I’ve made several similar ones in the past. You might, slightly, increase the bends in your upper bracket, to eliminate the need for a spacer, there.
 
Looks like it has been a while since we were able to work on the cub. In January, I had an ER visit for a blood pressure spike, then it got a little to cold, then spring and summer came. But we are now finally back at it.

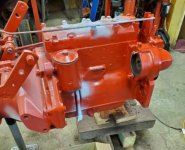
Over the spring, I was able to flush out the engine
Engine flush top and bottom.JPG

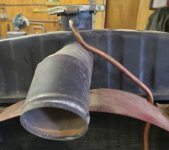
My oldest daughter and I were able to attend the Barnyard Bash. This year we brought a few projects to work on. One of them was drilling and retapping the holes in the bolster for the doglegs. We also made a new overflow tube. The tube that I got from TM did not fit correctly. We had an interference with the upper radiator pipe. We used a piece of copper tubing, bent it into shape and then soldered it into place.

overflow tube.JPG
overflow tube top.JPG

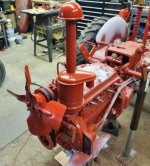
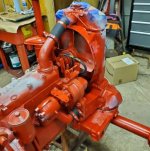
Now that the holidays are here, I have two weeks off of work and plan to make up for some lost time. We finished cleaning the engine, air cleaner, fan and distributor.

right engine painted.JPG
air cleaner fan painted.JPG
distributor painted.JPG

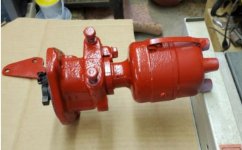
When I took the distributor off, there was no oil found between the housing and engine. Looks like the seal is still good. But I did notice that one of the distributor clamps is missing. A quick call to JP Tractor Salvage is going to fix this problem. The part will be put in the mail tomorrow.

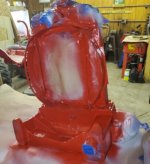
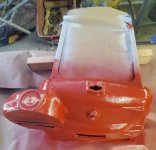
Next up will be cleaning the Bolster and getting that into primer and paint.
 
Next up was the front axle

axle original.JPG

During the clean-up found a surprise. There was a crack near the center pivot

axle crack.JPG
axle crack 2.JPG

To repair, I first cut a V-groove

axle v grind.JPG

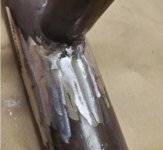
Then ran a bead of weld and polished it smooth

polished axle weld.JPG
polished axle weld 2.JPG
 
A little primer and some paint, and the axle doesn't look too bad.

axle crack primed.JPG
axle painted.JPG

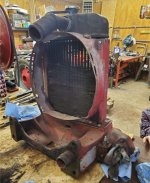
We also got the Upper and Lower coolant pipes cleaned up.

cooling pipes primed.JPG

Other than getting the front rims cleaned up, I should be able to meet the goal of having the cub back on all fours again by the end of the year. The pile of parts that need to be cleaned is starting to get rather small. I want to try and have everything ready for final paint by the end of January. Then I will set it aside until July when it gets hot and put on the final paint.
 
I had a friend come over and help out in the shop. With all of the parts we were able to clean, prime and paint the last two weeks, it was time for some reassembly.

First of was reinstalling the distributor.
distributor installed.JPG
I am using the old Cap as masking. Once we final paint the tractor, I will put on a new shiny black cap.

Next up was the Air Cleaner and the fan.
fan air cleaner installed.JPG

I don't like the idea of paint on the belts. I will need to figure out a way to mask them off. I needed to install them now since the alternator belt is too small to thread around the fan later.

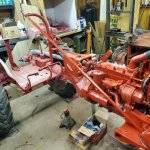
Finally time for the big pieces. The Bolster, Steering Assembly with new seals and the front axle went back on.
front end installed.JPG
front end installed right.JPG

I also plan on masking the cooling hoses prior to final paint. I wanted to install the water pipes now so I could repair the paint damage on the bolts during final painting.

I made our goal of having the tractor back on all fours even thought the front wheels are not done yet.

Next up are the front wheels and tie rods.
 
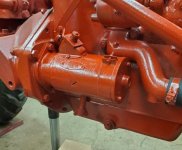
Before I had to go back to work last week, I was able to get the Steering Rod, Starter and Tie Rods cleaned up. Over the weekend, I got the Steering Rod and Starter installed.

steering shaft installed.jpg
steering seal.jpg
starter installed.jpg

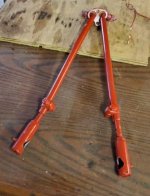
I couldn't install the Tie Rods yet. When I took the Tie Rods off last year, instead of finding the Tie Rod Ball Seats, I found small nuts being used. I am waiting on new ball seats from TM Tractor.
Tie Rods painted.jpg

I also had a little time to take the Tail Light apart and determine what parts I need.
Tail light apart.jpg
I have an order into Brillman for a new switch, terminal plug and lense clamp ring

The headlights that came with the tractor are brand new and work perfectly with 12v bulbs already installed.

This coming weekend is a long weekend with Monday being a holiday. I hope to get a lot closer of having this project ready for paint.
 
Back
Top