1950 Farmall Cub Refresh

tractorjunky

Active member
Two years ago we acquired a 1950 Farmall Cub through an online auction. The tractor ran well, but has some clutch problems. It also was repainted at some point. Since I bought this tractor for the wife, she wants to clean it up and paint it. When I met my wife, I already had several tractors and was dragging her to tractor shows. She decided if we are going to shows, she wants her own tractor. The reason she decided on the Cub was due to the headlights. The headlights make it look like a bug.

I always enjoy reading stories and looking at pictures of the restoration process. So I thought I would start this thread and share the story of refreshing this 1950 Cub. We finally got around to working on the tractor before my oldest daughter got too old and lost interest in machines. We are trying to make sure she is exposed mechanics, engineering and problem solving.

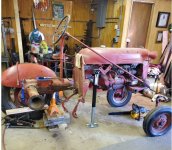
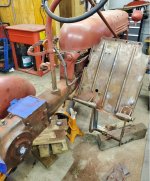
Here is the picture of the Cub when I went to pick it up. Serial Number: 120970

trailer.jpg
 
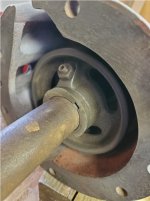
After getting the Cub home, one of the problems I noticed while driving it around were the brakes. The pedals did not seem to want to move much and there was little to no braking power. So the first thing we are diving into is replacing the brakes. We pulled off the right side final drive and of course, while you are in there, we finished taking the final drive apart to replace all the seals and inspect the bearings. When taking the brake drum off, we found our first surprise. The brake drum is sleeved. Due to the sleeve we had to press the drum off due to the slightly tighter fit.

brake drum 3.jpg

Before we could continue with rebuilding the Final Drive, we needed to do some upgrades to the parts washer. We installed a bucket underneath with a submersible pump and a filter unit. Now the parts washer is working a whole lot better.

partswasher.jpg
 
With a better operating parts washer, we finished cleaning all the parts and started the wire brushing, priming and painting process.

paint booth final drive.jpg

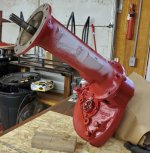
painted final drive 1.jpg

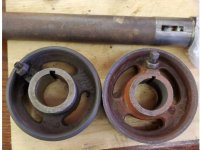
Since discovering the brake drum was sleeved I had decided to get a different drum. Once I got the pinion shaft cleaned up, I thought I would trail fit the new drum to the shaft. New problem discovered. The keyway on the new drum is about half the thickness of the sleeved drum. Where there two different drums available? Seems odd that someone would machine a larger keyway into the shaft. Either way, the old drum will be going back in.

brake drum comparison.jpg

The only thing we have left before assembly is wire brushing the Final Drive housing and priming it.
 
Yes, we have the bash on the calendar. Probably won't bring this one, but we may bring the other 1950 cub we have. I bought this one at a consignment sale in 2020. It was not running when I picked it up and I refused to push it off the trailer. After freeing up the throttle linkage, cleaning and lining the tank and replacing the plugs, wires and points, I drove it off the trailer. This one is in real nice original condition. Even the wiring harness is not molested.

thumbnail_Resized_20200621_132310.jpg
 
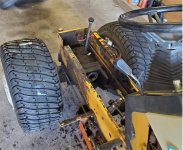
We were not able to get much done on the cub this weekend. Only was able to wire brush and prime the final drive housing. But I was able to finally fix the hydraulic leak in our Cub Cadet 2182. Apparently cork gaskets are only good for 30 years. The snowblower (soon to be converted to mower deck) still goes up and down and the tractor forward and back. I haven't checked back in to see if there is a puddle under it again.

2181 pump out.jpg

pump gasket.jpg
 
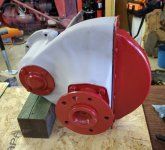
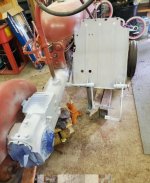
We made a little more progress this weekend. We were able to reassemble the right final drive. I left the casting in primer so after assembly we can do a color coat so all of the joints get painted and cover any tool damage to the bolt paint.

right final drive assy.jpg
right final drive assy 2.jpg

Reinstalling the sleeved brake drum went fairly smooth. We were able to tap into place using a brass drift and a hammer.

installed right brake drum.jpg

Next up, install the new brake band lining, cleaning up the axle tube, transmission housing and the bottom of the platform.
 
Spring is here, so I have had to spend time working on other things. But this weekend, I was able to make a little more progress. We were able to finish lining the brake band.
new brake lining.jpg

We also cleaned up the axle tube and reattached it to the final final drive.
axle tube on final drive.jpg
axle tube on final drive 2.jpg

I have started to clean the transmission, bottom of the platform and brake pedals.
platform transmission wire brush.jpg

We also cleaned up the left fender and got it in the prime.
primed fender.jpg

Slowly but surely we are making progress.
 
tractorjunky":2lbpv9qf said:
Since discovering the brake drum was sleeved I had decided to get a different drum. Once I got the pinion shaft cleaned up, I thought I would trail fit the new drum to the shaft. New problem discovered. The keyway on the new drum is about half the thickness of the sleeved drum. Where there two different drums available? Seems odd that someone would machine a larger keyway into the shaft. Either way, the old drum will be going back in.
Hi,
The Cub parts manual shows there was 1 width of key for the shaft and brake drum.
My guess is the original keyway was worn, and someone made the keyway wider.

You could probably buy a used shaft at JP Tractor Salvage if you wanted to use the brake drum you bought.

Below is a listing at TM Tractor for the left brake shaft, you can see the keyway width in the lower left pic.

http://www.tmtractor.com/new/fr/662fp.htm

Below are pages from the Cub parts manual showing the final drives, and brakes, the key is number 7 in the pic, it tells it's size in the description. :)

http://www.farmallcub.info/manuals/cub_ ... 007-12.jpg

http://www.farmallcub.info/manuals/cub_ ... 007-13.jpg
 
It has been a while since we have had time to work on the cub. Spring and Summer work, Barnyard Bash visit along with a vacation has been consuming our time. But I try and steal a few moments when I can.

I finally upgraded the gun in my sandblast cabinet with one from Skat blast. Boy what a difference, it transforms the Harbor Freight Cabinet into a real tool. With the upgrade I needed something to try it out with, so I decided to attack the seat post.

Here is my layout picture after I took it apart so I had a reference of how to put it back together.
seat layout.jpg

My oldest daughter helped with the blasting and the priming and painting. She is starting to get the hang of painting with a spray can but has a little way to go with her technique, but she helped with the priming and painting.
seat in booth.jpg

Once everything was dry, we laid out the parts to see if our before and after paint pictures matched.
painted layout.jpg

Last step was final assembly. Here is our final product.
seat painted assembled.jpg

Once the humidity breaks, we can get back to finish cleaning and priming the transmission and platform so we can reinstall the final drive.
 
I was able to get some shop time in over the long weekend. We have been painting the vinyl siding on the house the last few weeks so it was a nice change of pace.

With the cooler weather I thought it was time to finish wire brushing the bottom of the platform and the transmission and get a coat of primer on it.
platform transmission primed.JPG
platform transmission primed 2.JPG

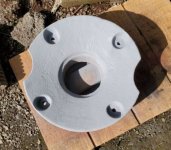
While the primer was drying, I hit the wheel weight with the wire brush and got that into primer as well.
wheel weight primed.JPG

Before I left for the day, I was able to get the hidden parts after assembly a couple coats of red.
bottom platform red.JPG

I couple weeks ago I also finished the wheel center.
wheel rim painted.JPG

I will give the paint a week or so to harden and then we can finally reinstall the Final Drive, fender, platform and wheel center with wheel weight.
 
The last couple weeks I have been working on the wheel rim. I was excited at first. The paint that was on the rim did not look like it was bonded well. So I got some paint stripper and started stripping the paint away which worked quite well. I was able to get most of the rim down to the galvanizing.

wheel rim galvanized.JPG

Then I got to the part of the rim where the galvanizing is gone and has been replaced by rust.
wheel rim rust.JPG
wheel rim galvanized and rust.JPG

I was hoping to be able to strip the paint and leave the rim original. Now I am not sure what to do as I would like to keep or reproduce the original look of the rim and not use shiny paint. I took a quick look at the other rim and it appears to have a decent amount of rust as well. With the rust being mainly around the valve stem, I wonder if the tires were loaded at one time.

I done a little looking into Cold Galvanizing Compound in a spray can. I am thinking of trying this on the rim and then giving it a coat of Matte Clear Coat to try and reproduce the original sheen of the rim. From what I have read, the galvanizing compound doesn't get very hard so that is where I thought the clear would help.

I need to finish cleaning the rim and try out the compound and see what happens.
 
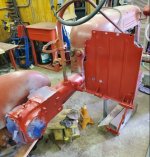
We were able to sneak away into the shop for a few minutes this afternoon. Finally after removing the right final drive 7 months ago, it has been reunited with the rest of the tractor.

Installed right final drive.JPG

Even though I painted the bolts months ago, they still received paint damage during reinstallation. This is why we are painting the hidden or hard to get areas as we go and do a final paint job when completely put back together. My goal is to minimize paint fastener damage.

Now that the final drive is back on, we can work on reinstalling the platform, seat post, wheel and wheel weight.
 
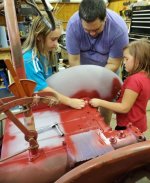
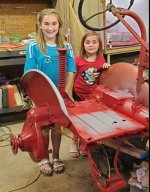
The girls and I made a little more progress this weekend. We got the platform bolted back into place, installed the fender and the seat post. We just need to finish cleaning up the rim and we can get the little Cub back on all fours. But not for too long, we need to repeat the process with the left FInal Drive.

girls install bolts rh final.JPG

girls tight rh final.JPG

finished rh final with girls.JPG
 
I'm very proud of the work your daughters have done!! Oh, and very impressed with your willingness and apparent patience, to include them! We "girls" can do just about anything if exposed to the tasks and HELPED with solutions, including making errors that we can learn from.

No one is BORN knowing how to do these things, male or female...we all rely on teachers!
 
Dale, thank you for the kind reply. In our house both girls are expected to learn how to fix and maintain things. Even if they don't want to do that type of stuff when they get older, I want them to at least now what others are talking about and when they are trying to be scammed.
 
Back
Top