1950 Farmall Cub Refresh

Saturday morning while we waiting to see if the sky wanted to rain or not, we where able to get a little shop time in.

I have changed up my plans a little. When we first brought the Cub home, the hydraulics where not working. I never got around to figuring out why before we started working on it. Originally I was going to clean up and replace the gaskets and seals in the Left Final Drive and then start the engine to figure out the hydraulic problem. But I have decided to go for an engine start first. I suspect the hydraulics work just fine and only need some fluid. My guess is that the seal in the pump is bad and everything leaked into the engine. The engine oil level is at the full mark so I bet the hydraulics have not worked for some time. Even though I am not going to drive the tractor around, I will feel better running the engine on all 4 wheels and not jack stands.

In trying to get ready to start the engine, we first installed the wheel center back onto the rim and then took the easy route by setting the wheel on the wheel weight for installation. Since the rims need to come back off for final paint, I will figure out what to do with the rust spots on the rims then. The wheel is not on the tractor yet since I wanted to prime and paint the lug bolts first.

wheel weight install.jpg
installed wheel weight.jpg

Then we moved onto installing the PTO shaft and the Right Angle Gearbox. First we finished cleaning out the differential.

Palynn cleaning.jpg
Haylee cleaning.jpg

My girls are not afraid to get a little dirty, and even seem to have fun doing it.
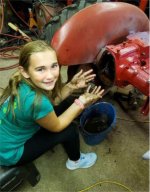
Palynn dirty hands.jpg
Haylee dirty hands.jpg
 
Now that everything is clean, we installed in the Differential Cover Plate and the PTO Shaft. I took the fill plug off to help see the PTO lever engage, but really didn't need it. Once we had the PTO shaft lined up with the Input Bushing everything kind of fell into place.

Palynn gasket glue.jpg

One job that my oldest has been waiting for is to reinstall the Transmission Shifter. She helped take it off and clean it up and now it is time to reinstall.

Haylee gasket glue.jpg
Palynn shifter.jpg

We also filled the Right Angle Gearbox with gear lube (SAE 90). When I went to get the fill-to-spill plug out for the transmission, I found someone has been rather hateful with this plug. It is no longer square and almost cone shaped. Since I plan to take the Left Final off, I will better access to work on getting this plug out. Next time I get out to the shop, we still need to fill the Right Final.

Looks like the sun is starting to come out, so we have to stop working on the Cub for now and get back to painting the house. One more wall to go. We should get it done before it starts to get cold.

Happy girls shifter gearbox.jpg
 
The past couple of nights, we were able to finish the preparation to start the engine. We found a good battery and connected it, filled the hydraulic system with Hy-Tran and primed the oil pump. I used the squirt oil in the hole in the oil filter housing method. Trying to get the pump primed we actually drained the battery before it was primed. We probably squirted oil in the hole at least a dozen times and bumped the starter for 5 - 10 seconds each time. After the battery was recharged it only took another 2 or 3 attempts and we had a good stream of oil coming out of the hole.

Only ingredient left is gas. We installed and connected a pony gas tank that we have.

pony gas tank.jpg

With switch on, a bump on the starter and little choke, the engine fired right up acting like it was just ran yesterday. After a few seconds to fill the oil filter housing, the oil pressure came alive.

oil pressure cold.jpg


Now it is time for the reason for starting the engine in the first place, do the hydraulics work? And they do!! They seem very responsive and fast moving.
hydraulics down.jpg
hydraulics up.jpg

After a good 5 - 10 minutes of running, the oil pressure backed down some, but still looks pretty good.

warm oil pressure.jpg

I would say this was a successful day. The engine still starts and sounds good and the hydraulics work. I took a picture of the engine oil level so I can monitor if the seal on the hydraulic pump is good. If the engine starts producing more oil, I will have to replace the seal. Time will tell. This is why I wanted to test the hydraulics sooner than later so I can give the seal as much time as I can to decide to leak or not.

oil level.jpg

I did have one new finding as a result of running the engine. Looks like the rear main oil seal is leaking. With the little run time we put on the engine, there is a little puddle starting to form under the bellhousing. I will add that to the list of things to fix when I split the tractor to dig into the clutch problems.
 
The girls and I were able to spend a little time in the shop Friday night. I was glad we were able to spend some time on it Friday as we were going to Cub-o-ree at Cub World on Saturday and wouldn't be able to work in the shop much over the weekend.

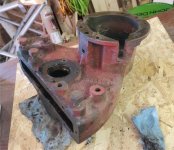
Now that the condition of the hydraulics is known and while we wait to see if the oil will leak into the engine, we started to dig into the Left Final Drive. We removed the drain pan and let the oil drain. Once the dripping mostly stopped, we were able to get the Final Drive off of the tractor along with the fender.

left final 03.jpg

With the final drive sitting on the bench, we removed the various bearing covers and let the oil to continue to drain before we proceed much farther in the disassembly.

left final 02.jpg
left final 01.jpg

With the final drive off, I was able to get a good bite on the transmission Fill-to-spill plug with some vice-grips. With a rather hard clamp, the plug gave up and came out. I have added a new plug to the shopping list for the next time I stop at the hardware store.

tranny plug.jpg

Now that the Final Drive is sitting on the bench, we have a good amount of work ahead of us: Reline brake band, finish cleaning differential and transmission, new gaskets and seals in the Final Drive, clean wheel center and wheel weight.

Oh-yeah about the Cub-o-ree, talk about a real bait and switch, there where no Farmall Cubs to work on and not even one to be found anywhere (I looked). My youngest has joined Cub Scouts and there was an overnight camping event for the whole family at the Scout's park that they have affectionately named Cub World.
 
If you haven't done it before, they is a good "how to" on relining the brakes with a parts list for McMaster-Carr that sells lining by the foot.
 
We didn't get too much done this weekend as we spent all day Saturday at an auction.

We did go into the shop for a little while Friday night. Looks like I have my answer about the seal on the hydraulic pump. The dipstick now reads full and there is an ever growing puddle under the bell housing.
oil level full.jpg
oil puddle.jpg
oil level.jpg

I have added replacing the hydraulic pump o-ring to the list of repairs we need to do.

Back to the auction. The main reason we went is that there was a Farmall Cub in the estate sale. When telling my wife about the sale a couple weeks ago she told me that she wanted it so she could have a small herd of cubs. I think she has been infected by the incurable antique tractor disease :{_}: . At least there is no quarantine required once infected. The bidding ended in our favor and we brought home a 1948 Cub. Now each of my girls (wife and two daughters) each have their own cub. The wife's cub is what we are cleaning up and painting so it looks "shinny" as she has requested.

1948 cub.jpg
serial plate.jpg

The cub is a 1948 with magneto ignition. Except the Magneto must have quit working some time ago as they are using it as a distributor with an external coil. They were also starting it with a 12v battery but the generator is still in place. The ammeter was not showing any indication of charging so it may not be hooked up. They also had the head lights disconnected. What is interesting is the battery metered around 13 volts and the wires that should be hooked up to the lights metered around 8-9 volts. There is also a ballast resistor between the 12v coil and the magneto. I plan to fix the wiring and the magneto to return it to the original configuration. Over the winter I will try to collect the parts and maybe bring it to the Barnyard Bash in the spring.

There is one other major flaw. The carburetor leaks like Niagara Falls. The son of the estate sale said that the carb is warped. After doing some research in the archives on this site, I see that it should be repairable. I need to see how the week goes with work and I may try to bring the carb to the Shallow Creek Cubfest later this week to get some help with the repairs.

The oil pressure gage was not working when we brought it home, we couldn't even see the needle. As it turns out the gage was full of oil. I had a spare gage on hand, installed it to see what the condition of the pump was. Pump is pumping and rather healthy with around 20 psi.

oil pressure.jpg

With what little playing around we did with it, the hydraulics work, the PTO engages and works and the mower deck runs nice and smooth and quiet. Now we need to hurry up and finish the fall clean-up work so we can spend more time in the shop.
 
If the hydraulic pump is leaking, it will leak hydraulic fluid into the oil pan, not on to the floor. The level on the dipstick will go up, not down. I would bet that your rear engine seal is leaking and needs to be replaced. The tractor needs to be split for that.
 
I believe you are correct. When I had the engine running last week, oil was dripping from the bell housing pretty much instantly. Looking in the clutch adjustment hole, there is plenty of oily/grime build-up and with the newly found puddle, a new seal is on the punch list. I figure the hydraulic oil is going into the engine oil pan, then heading out the leaky rear seal. I need to split the tractor anyway to dig into some clutch issues it has. Looking in the clutch adjustment hole, there is plenty of oily/grime build-up. The girls will have fun cleaning up that mess.

I do find it interesting that the dip stick reads perfectly full as the oil leaks out the rear seal. Not much margin to the rear seal if the engine is accidently is over-serviced and too much oil is put in it.
 
A few nights last week and over the weekend we were able to sneak away into the shop and finish taking the left final drive apart. This one came apart with no surprises unlike the right one did.

right final drive housing.jpg
right final drive parts.jpg

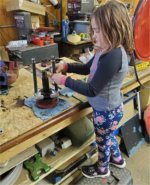
Friday night after big sister left to spend the weekend at a friends house, my 6 year old and I managed to remove the bearing from the axle. She is really getting into this tractor stuff.

bearing puller haylee 2.jpg
bearing puller haylee.jpg

Sunday afternoon my 6 year old asked if we can go out to the shop and work on the tractor. How can you say no to a request like that? On the way out the door, she said that she wanted a ride on her tractor first then we can go into the shop. So I took the other 1950 Cub out of the tent and gave her a few laps around the yard. Once in the shop, we started in on cleaning the final drive parts.

parts washer haylee.jpg

I don't think she has too many friends that would find enjoyment cleaning parts in a parts washer.

parts washer bull and axle.jpg

I think my youngest is going to be the mechanically inclined one. Since we are going to work on most everything other than the engine on this cub, I would like to find a Super C that needs an engine rebuild when my youngest is a little older so I can teach them more about the engine. Why the Super C? My grandfather farmed with one that my dad now has and I am expecting my brother will end up with it. So the next best thing is to get another tractor of the same model.

Hopefully we can sneak out a couple times this week and clean up a few more parts. My goal is to reinstall the final drive over Thanksgiving break so we can keep this project moving along.
 
This weekend we where able to finish cleaning and prime some of the parts for the Right Final Drive.
primed right final parts.jpg

We also started cleaning the grim out of the housing. We got as much as we could, but I think I will still hit it with the power washer to get some of the hard to reach areas. Then a visit to the wire brush.

A couple weeks ago, I started to take the clevis and nut off of the brake band. The nut was loose, but the clevis was not. I gave the clevis a little heat from a MAPP gas torch and it came right off. Knowing that I should let things cool completely before trying the nut, I got antsy and didn't wait long enough and well you guessed it, I broke off the end of the brake band rod.

broken band.jpg

Now what to do? I really didn't want to get a new one and the cost of used ones where not all that attractive, I thought let's give repairing the broken one a try. What's the worse that can happen? I finish destroying an already broken part and still need to buy a new one.

I found some 5/16-24 all thread online. Before I started the repair, I made some reference measurements so I know what length I need when done.

I first cut off the last remaining thread from the rod. Then I chamfered the brake rod and the all thread.
weld fixture.jpg

I mounted the brake band and all thread into an aluminum fixture I had from another project. This way when I weld, my parts won't stick to the fixture.

weld fixture overview.jpg

Even though I have a welder, I really don't consider myself as a welder. I get by with the little projects I do. I presume the preferred tool would probably be a TIG welder, but I only have a MIG so I connected the ground and gave it ago.

Here is what I ended up with after welding all around:
fuzzy weld glob.jpg

Not the prettiest weld, but hopefully good enough. As I started to grind the weld down to match the diameter of the rod, I did not see any indication of where the two part were butted together. So I think I have a pretty good joint.

Final step was to cut some threads into the weld region so it would match the original and then cut the brake rod to length.

With the nut and clevis safely returned to the brake assembly, I can continue refreshing the brake band. I have the old lining off. I need to clean the brake up, prime, paint and install the new lining.
finished repair.jpg
 
You all are doing a good job! Keep it up! Good to see your girls involved and echo Dale's sentiments earlier about getting them involved.
:tractor:
 
We have made a little more progress over the past week or two. We have finished cleaning and priming all the parts for the final drive, and even a little paint in the hard to get to areas after assembly.
primed final drive.jpg
final drive parts ready.jpg

The wheel center has made a trip through the blaster and has been since painted.
center blasted.jpg

The newly repaired brake band has been painted along with the bolts to mount the wheel weights. I also made and painted a bracket that will mount using the starter bolt holes and a side wind jack for splitting the tractor. We need to replace the rear main seal and assess the clutch. A few months ago I took the round clutch cover off to discover that two of the adjusting bolts have fallen out of the clutch.
brake parts painted.jpg

To round out the weekend, my youngest came out to the shop wanting to help. So, I taught her about a new tool and her chase the threads in anticipation for installing the final drive.
haylee chasing threads.jpg

I think we have us in pretty good shape to make some good progress over Thanksgiving break putting the Final Drive back together.
 
Over Thanksgiving break, we were able to check off a few more boxes on the to-do list. I am going to split the update into several posts so I can share more pictures. I always enjoy looking at pictures of others work.

We started off by cleaning the rest of the transmission and steering column and getting them into primer and paint.
painted transmission.jpg

Then we reassembled the Final Drive and finished priming and painting that as well.
assembled final drive.jpg
assembled final drive 2.jpg

While we waited for the paint to dry, we did a trail fitting of the Splitting Stand Bracket we made. We are using the starter pad to attach the bracket.
splitting stand bracket.jpg

We also bolted a caster to the bottom of a side wind jack to roll back the rear end. I have the jack temporarily installed on the engine side just to see how everything fits and to verify that the handle did not have any interferences. When we go to split the tractor, I think I will leave the engine stationary and roll the rear end away.
splitting stand.jpg
 
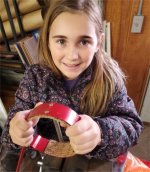
With the Final Drive and Transmission ready for reassembly, we are still one part shy of being ready. We still need to install the new brake lining. With some help from my oldest and the instructions found in the how-to section (http://www.farmallcub.com/phpBB2/viewto ... 54&t=66324), we are off to install the lining.

First we preformed the lining so it would fit into the brake band. Then I used another brake drum and some zip ties to help finish forming the lining. After we had the lining formed around the drum we slide the drum half way off and clamped the lining to the band. I don't have many small c-clamps, so we used some anchors that are used for securing a tarp.
brake lining in clamps.jpg

Once the donor drum was removed, we marked the holes on the lining. First using a small diameter drill bit for the thru hole, we then used a drill bit from my pocket screw kit. You just need to be careful when drilling the counterbore that you don't get too deep.
pocket screw drill bit.jpg

With the holes drilled, now it is time to install the rivets. For a bucking bar, I ground the tip off of a large nail spike and secured it in a vise so the head of the spike was resting on the vise arm.

brake rivit bucking bar.jpg

With the help of a few extra hands, we set the rivets. What worked for me was first using a Center Punch to start the flare, then a Roll Pin Punch to continue the flare, then using a Flat Punch to finish peening everything flat.
extra hands brake lining.jpg
rivit bucking tools.jpg

Here is the end result. We are now ready to install the Final Drive.
new brake lining.jpg
 
tractorjunky":3mkhr3z0 said:
I am going to split the update into several posts so I can share more pictures.
Actually, this whole thread should probably be moved to the Farmall Cub Forum. There’s much more here than just photos.
 
With the paint dry and the brake relined, we set off to install the Final Drive. I know what you are thinking, what about the Fender, that needs to be installed with the Final Drive since they share the same bolts. It was my desire to install the Fender at this time, but the Fender needs a little more attention than I was planning. I didn't want to hold up other parts of the project so only installing the two bottom bolts and one on the top, we reinstalled the Final Drive. When the Fender is ready for installation, I just need to remove one bolt and we can install the fender along with the four remaining bolts.

installing final drive.jpg

With the Final Drive on we reinstalled the rear wheel with the Wheel Weight installed as well.

back wheel reinstalled.jpg

It is a rather nice feeling to be done with the Final Drives. It seems as if we have been working on them forever. Considering we dug into the Right one in January of this year, forever may not be that far off. Either way, time for something new.

Next up, we removed the Dash Panel, the Hydraulic Tubes and the Hydraulic Block.
removing dash.jpg

I recently tested the hydraulic block and everything seemed to work as it should. Now that I have it off of the tractor, is there anything I should inspect?

With the Hydraulic Tubes off, we are all set to split the tractor. We need to split to replace the Rear Main Seal and assess the condition of the clutch. When I first removed the clutch cover a few months ago, I found two of the spring finger bolts at the bottom of the housing.

TST, if you are reading this, I will be contacting you to have the Seal Housing reworked for a new seal in a couple of weeks.
missing hydraulic unit from tractor.jpg

One final thing we did to close out the weekend was to install plugs in the spark plug holes. It turns out that Oil Drain Pan plugs have the same M18-1.50 threads as the spark plugs. I wanted to get the spark plugs out of the way to make cleaning and painting the head easier.
spark plug plugs.jpg

We probably won't get much done next weekend as that is my Wife's favorite holiday, Tree Getting Day! We make a day of getting the Christmas Tree, so not much Cub work planned. But at least Christmas Break is right around the corner.
 
With the Touch Control block, you might want to see if there is ANY indication of leaking from the control rod. It is fairly easy to pull it out toward the front, and replace the one o-ring there (TM Tractors has it). It's much more involved once the block is reinstalled! Also check the boots & replace, if needed. There are new leather ones as well as rubber ones available.

You are probably already aware, but when you are painting the panel & clutch housing, make sure the mating surfaces are clean of dirt, primer and paint. That is a grounding path.

Great work by you guys...want to rent out your daughters for some more tractor work?! They are getting well trained, and I currently have 3 waiting for work!! :lol:
 
Dale, thank you for the reminder about the ground path. I probably would have forgotten and then wondered why I have a problem.

I am sure if we lived a little closer, the girls would love to come over an help. I guess we will have to wait for the Barnyard Bash in the spring for them to help you out again.
 
Back
Top