This site uses cookies to maintain login information on FarmallCub.Com. Click the X in the banner upper right corner to close this notice. For more information on our privacy policy, visit this link: Privacy Policy
NEW REGISTERED MEMBERS: Be sure to check your SPAM/JUNK folders for the activation email.
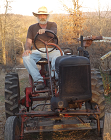
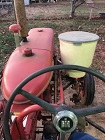
New to Me Farmall AV
Forum rules
Notice: For sale and wanted posts are not allowed in this forum. Please use our free classifieds or one of our site sponsors for your tractor and parts needs.
Notice: For sale and wanted posts are not allowed in this forum. Please use our free classifieds or one of our site sponsors for your tractor and parts needs.
-
Dale Finch

- 10+ Years

- Posts: 6693
- Joined: Tue Apr 27, 2010 11:34 am
- Zip Code: 27517
- Tractors Owned: '51 Cub #140966 "Bruno" with Woods 59 mower
'55 Cub #187541 "Betty" with Fast Hitch
'55 Cub #190482 "Ben" with Woods 42 mower
'55 Cub #191739 "Bertha" with Woods 42 mower
'56 Cub #194370 "Boris" with Mott Flail mower - Circle of Safety: Y
- Location: NC, Chapel Hill
Re: New to Me Farmall AV
VERY NICE!! Wanna swap?! Yours will probably get installed the right direction, too!! 
Dale Finch


-
Stanton

- Cub Pro

- Posts: 7760
- Joined: Mon Jun 22, 2009 6:56 am
- Zip Code: 64070
- Tractors Owned: 1942 Farmall AV, serial #87025
1947 Farmall Circle Cub, serial #2116
1948 Farmall Cub, serial #46066 - Circle of Safety: Y
- Location: Lone Jack, MO
Re: New to Me Farmall AV
Didn't know until I removed the finals that one of the brake band loops was rusted away (on the left). That particular brake pad was worn much thinner than the other one.
First thing was to remove the old rivets, straightening out the bent rods, then disassembly and cleaning with a wire wheel.
Bought a new piece of 14ga sheet metal for the band and I had a 3/8" steel rod in the bin. Looking at the original, it was hard to tell how the rod transitioned to the flat triangular sheetmetal, so decided to cut a slot in the rod and weld them together.
Next was the loop. Started it in the bench vise, then moved on to the press and finished up on the vise again.
After the loop was bent, it was welded and then trimmed to the narrower, tapered width. Now I was ready to mark the rivet holes. One hind-sight note here: if doing this again, I would wait and drill the holes after the band was bent. I thought it was easier to drill them all while the band was flat--and it was--but when I started the bending process, the sheetmetal wanted to crease across each pair of rivet holes. Obviously, the two holes were enough to create a weak spot across the band. It wasn't insurmountable, but annoying.
Am using the cast brake hub as a form to bend the band around. Clamped both the to bench at the end so I could keep bending all the way over.
After getting the band basically bent, I used the other good brake band to mark it, then cut to length. The factory used a spot welder, which I don't own, so I drilled out (3) 1/8" holes in the triangular piece attached to the rod. Then when I was welding the two together, I filled up the holes with weld. Doubt it will come apart.
Ordered some brake band material from McMaster-Carr--same as for Cubs, only 1-3/4" wide, not 1-1/2". The rest of the task was riveting the brake liners onto the bands. Instructions can be found in the How To Forum.
- Brake band loop rusted away.
First thing was to remove the old rivets, straightening out the bent rods, then disassembly and cleaning with a wire wheel.
- Drilling out the old rivets.
- Disassembled brake bands.
Bought a new piece of 14ga sheet metal for the band and I had a 3/8" steel rod in the bin. Looking at the original, it was hard to tell how the rod transitioned to the flat triangular sheetmetal, so decided to cut a slot in the rod and weld them together.
- Cut slot in rod.
- Drew out end for rod.
- End before inserted into rod.
- Welded together and threaded 3/8-24 fine.
Next was the loop. Started it in the bench vise, then moved on to the press and finished up on the vise again.
- Getting ready to bend the loop end.
- Got it down tight.
- Finished up in the vise.
After the loop was bent, it was welded and then trimmed to the narrower, tapered width. Now I was ready to mark the rivet holes. One hind-sight note here: if doing this again, I would wait and drill the holes after the band was bent. I thought it was easier to drill them all while the band was flat--and it was--but when I started the bending process, the sheetmetal wanted to crease across each pair of rivet holes. Obviously, the two holes were enough to create a weak spot across the band. It wasn't insurmountable, but annoying.
- Marked the rivet holes.
Am using the cast brake hub as a form to bend the band around. Clamped both the to bench at the end so I could keep bending all the way over.
- Ready to bend around the hub.
- Straight up...
- ...and over.
After getting the band basically bent, I used the other good brake band to mark it, then cut to length. The factory used a spot welder, which I don't own, so I drilled out (3) 1/8" holes in the triangular piece attached to the rod. Then when I was welding the two together, I filled up the holes with weld. Doubt it will come apart.
- Time to trim off the band.
Ordered some brake band material from McMaster-Carr--same as for Cubs, only 1-3/4" wide, not 1-1/2". The rest of the task was riveting the brake liners onto the bands. Instructions can be found in the How To Forum.
- Measuring against the hub and old brake band.
- Clamped.
- Drill out the rivet holes...
- ...then remove and countersink for the recessed rivet heads.
- Punched down the rivets.
- Finished.
Stanton
-
Indy4570
- 5+ Years

- Posts: 961
- Joined: Tue Nov 28, 2017 2:12 am
- Zip Code: 65608
- Tractors Owned: 49 F cub, donor
50 Farmall Cub bugeyes(dead)
55 Farmall Cub Clementine
55 International loboy
62 140 Industrial The Beast
50s Allis Chalmers B
50 Ferguson TO20 Huppster
49 Ferguson TE20 Fergie
JD 790 4x4 w/backhoe
hinomoto diesel 4x4, early to mid 80s 20HP
73 Pasquali 4x4 diesel 33HP
74 Toro golf course tractor
Gilson 18HP - Circle of Safety: Y
- Location: Missouri Ozarks
Re: New to Me Farmall AV
love to watch your work progress!
better to have it and not need it than to need it and not have it...( YES this includes CUBS! )
-
Slim140
- 5+ Years
- Posts: 4908
- Joined: Wed Nov 22, 2017 6:24 am
- Zip Code: 00000
- Tractors Owned: .
1970 International 140
1972 International 140
1949 John Deere A
1993 Ford 4630 W/Loader
1965 John Deere 110
1961 Cub Cadet Original - Circle of Safety: Y
Re: New to Me Farmall AV
Awesome job Stanton. Looks like an original.
Every home is a school, what are you teaching?
-
randallc

- Cub Pro
- Posts: 1906
- Joined: Tue Jan 18, 2011 9:16 am
- Zip Code: 72940
- Tractors Owned: 1951 Farmall Cub, 152 disk plow, 2 gang disk, belly mower, sickle mower
1949 Farmall Cub, cultivator, moldboard plow, disk,front blade. Cub Cadet, LTX1045 Mower. Cub Cadet's 109, 125, 1000, and 1250
1961 cub c2 belly mower and full blade. 48 cub manual lift with cultivators.
1947 Cub - Circle of Safety: Y
- Location: Huntington, AR
Re: New to Me Farmall AV
A+
Guinea, 1951 Farmall Cub; Jumping Willy, 1949 Farmall Cub, 61 Cub, Scrapy, and 48 Cub Al, 48 cub, Billy D.
-
Stanton
- Cub Pro
- Posts: 7760
- Joined: Mon Jun 22, 2009 6:56 am
- Zip Code: 64070
- Tractors Owned: 1942 Farmall AV, serial #87025
1947 Farmall Circle Cub, serial #2116
1948 Farmall Cub, serial #46066 - Circle of Safety: Y
- Location: Lone Jack, MO
Re: New to Me Farmall AV
Thanks.
Received the new seals for the finals earlier this week, so plan to start that soon.
Received the new seals for the finals earlier this week, so plan to start that soon.
Stanton
-
Stanton
- Cub Pro
- Posts: 7760
- Joined: Mon Jun 22, 2009 6:56 am
- Zip Code: 64070
- Tractors Owned: 1942 Farmall AV, serial #87025
1947 Farmall Circle Cub, serial #2116
1948 Farmall Cub, serial #46066 - Circle of Safety: Y
- Location: Lone Jack, MO
Re: New to Me Farmall AV
Wire wheeled down the torque tube and tranny. Noticed the rear, bottom bolt at the back of the PTO cover/housing was loose. There was excessive oil and grime indicating a leak. Removed the back PTO cover and discovered most of the housing for the lower bolt was broken. There are a few threads left, that with a longer bolt, will be able to get it to seat again.
Ah, there's always some challenge waiting to reveal itself.
Ah, there's always some challenge waiting to reveal itself.
Stanton
-
Stanton
- Cub Pro
- Posts: 7760
- Joined: Mon Jun 22, 2009 6:56 am
- Zip Code: 64070
- Tractors Owned: 1942 Farmall AV, serial #87025
1947 Farmall Circle Cub, serial #2116
1948 Farmall Cub, serial #46066 - Circle of Safety: Y
- Location: Lone Jack, MO
Re: New to Me Farmall AV
As mentioned in the previous post, there was excessive oil at the bottom of the tranny and PTO. Found out when I removed the PTO that the lower bolt hole in the tranny casting was busted off, allowing gear oil to come in contact with the bolt and hole. Besides, the bolt in there wasn't long enough to catch any of the remaining threads.
Thought a plug of JB Weld Steel Stik would work. Mixed some up and used a piece of steel and a bolt as a form where the gasket would go. I used a longer bolt to engage the cast iron threads that were still in there. Also left the bolt in place while the JB Weld dried. Good idea to lubricate the bolt with auto paste wax so you will be able to remove it when dry.
Once that was done, all I needed to do was to install a new rear PTO seal and reassemble.
Bought a roll of gasket material at O'Reilly Auto Parts and tapped out a gasket. I like punching a couple holes and inserting the bolts to keep the gasket material in place when tapping. Always need to go around the gasket with an X-acto knife to clean it up.
Got the tranny all buttoned up and set aside. Ready to start work on the drop axles.
Thought a plug of JB Weld Steel Stik would work. Mixed some up and used a piece of steel and a bolt as a form where the gasket would go. I used a longer bolt to engage the cast iron threads that were still in there. Also left the bolt in place while the JB Weld dried. Good idea to lubricate the bolt with auto paste wax so you will be able to remove it when dry.
- Formed up JB Weld.
- Dry and ready to go.
Once that was done, all I needed to do was to install a new rear PTO seal and reassemble.
- PTO cleaned, new rear seal, ready to reassemble.
Bought a roll of gasket material at O'Reilly Auto Parts and tapped out a gasket. I like punching a couple holes and inserting the bolts to keep the gasket material in place when tapping. Always need to go around the gasket with an X-acto knife to clean it up.
- Tapping out the gasket.
- A couple bolts in to keep gasket in place.
- Finished gasket.
Got the tranny all buttoned up and set aside. Ready to start work on the drop axles.
- Finished tranny.
Stanton
-
Indy4570
- 5+ Years
- Posts: 961
- Joined: Tue Nov 28, 2017 2:12 am
- Zip Code: 65608
- Tractors Owned: 49 F cub, donor
50 Farmall Cub bugeyes(dead)
55 Farmall Cub Clementine
55 International loboy
62 140 Industrial The Beast
50s Allis Chalmers B
50 Ferguson TO20 Huppster
49 Ferguson TE20 Fergie
JD 790 4x4 w/backhoe
hinomoto diesel 4x4, early to mid 80s 20HP
73 Pasquali 4x4 diesel 33HP
74 Toro golf course tractor
Gilson 18HP - Circle of Safety: Y
- Location: Missouri Ozarks
Re: New to Me Farmall AV
looking good!
better to have it and not need it than to need it and not have it...( YES this includes CUBS! )
-
Stanton
- Cub Pro
- Posts: 7760
- Joined: Mon Jun 22, 2009 6:56 am
- Zip Code: 64070
- Tractors Owned: 1942 Farmall AV, serial #87025
1947 Farmall Circle Cub, serial #2116
1948 Farmall Cub, serial #46066 - Circle of Safety: Y
- Location: Lone Jack, MO
Re: New to Me Farmall AV
Back at the AV now that the lathe is finished.
Disassembled the right drop axle to replace the oil seal bearings. The bearing on the axle did NOT want to come off. Looks to be original to the tractor. Finally persuaded it loose with some well placed pressure and promises of a trip to Sonic for ice cream.
Need to get the bull gear and housing degreased and wire wheeled down. Will reassemble this one before tackling the left housing.
Stanton
-
Stanton
- Cub Pro
- Posts: 7760
- Joined: Mon Jun 22, 2009 6:56 am
- Zip Code: 64070
- Tractors Owned: 1942 Farmall AV, serial #87025
1947 Farmall Circle Cub, serial #2116
1948 Farmall Cub, serial #46066 - Circle of Safety: Y
- Location: Lone Jack, MO
Re: New to Me Farmall AV
Here are some pics with captions:
I used old gasoline to degrease parts. Then a twisted wire wheel brush and a twisted cup brush in an angle grinder to strip everything (and I mean everything) off.
If you don't have an impact wrench, then a breaker bar or large socket wrench will work, but you'll have to put something in the bull gear to keep it from turning.
A 2" diameter pipe, longer than the axle shaft, is required to press the bearing back on.
When I pulled the bull gear out, you could see the wear marks on the nubs of the gear. Looks like it's been outta wack for sometime. Could be part reason this tractor was parked. Bought some machine bushings at TSC that had a 1-3/8" ID and stacked 3 on the axle to take up the space of the damaged spacer.
- Drained the axle housing overnight.
I used old gasoline to degrease parts. Then a twisted wire wheel brush and a twisted cup brush in an angle grinder to strip everything (and I mean everything) off.
- Caked on oily grime with a dented lip.
- Drop pan cleaned up and dent fixed.
If you don't have an impact wrench, then a breaker bar or large socket wrench will work, but you'll have to put something in the bull gear to keep it from turning.
- Battery operated impact wrench removing axle nut.
- Pressing out the old axle bearing.
- Gaskets cut.
A 2" diameter pipe, longer than the axle shaft, is required to press the bearing back on.
- Axle going together.
- Right axle done. Left one to go.
- The inner axle bearing seemed too far into the housing.
- Inner bearing spacer was destroyed somehow.
When I pulled the bull gear out, you could see the wear marks on the nubs of the gear. Looks like it's been outta wack for sometime. Could be part reason this tractor was parked. Bought some machine bushings at TSC that had a 1-3/8" ID and stacked 3 on the axle to take up the space of the damaged spacer.
- Don't know how that happened.
- Left drop axle now done.
- Drums are next...
Stanton
-
Dale Finch
- 10+ Years
- Posts: 6693
- Joined: Tue Apr 27, 2010 11:34 am
- Zip Code: 27517
- Tractors Owned: '51 Cub #140966 "Bruno" with Woods 59 mower
'55 Cub #187541 "Betty" with Fast Hitch
'55 Cub #190482 "Ben" with Woods 42 mower
'55 Cub #191739 "Bertha" with Woods 42 mower
'56 Cub #194370 "Boris" with Mott Flail mower - Circle of Safety: Y
- Location: NC, Chapel Hill
-
Stanton
- Cub Pro
- Posts: 7760
- Joined: Mon Jun 22, 2009 6:56 am
- Zip Code: 64070
- Tractors Owned: 1942 Farmall AV, serial #87025
1947 Farmall Circle Cub, serial #2116
1948 Farmall Cub, serial #46066 - Circle of Safety: Y
- Location: Lone Jack, MO
Re: New to Me Farmall AV
Dale Finch wrote:Nice job!!
Thanks, Dale. Hoping to get those brake drums done, then put the brake bands on and get some assembly going...

Stanton
-
Stanton
- Cub Pro
- Posts: 7760
- Joined: Mon Jun 22, 2009 6:56 am
- Zip Code: 64070
- Tractors Owned: 1942 Farmall AV, serial #87025
1947 Farmall Circle Cub, serial #2116
1948 Farmall Cub, serial #46066 - Circle of Safety: Y
- Location: Lone Jack, MO
Re: New to Me Farmall AV
Ok, you International Blue fans out there. Seems like the last couple tractor projects, I can't help myself to sneak in some Int'l Blue somewhere. This time, the AV gets blue brake drums. Pretty snazzy, don't ya know.
The clutch shaft needed cleaned up before I could put the torque tube back on. Got to looking at it and noticed only (3) bolts holding the flange/disc/shaft assembly; I'm missing one. Looked for it, but didn't find it. Thought it may be in one of the many boxes containing parts, but no. Took the assembly apart and that's when I really noticed the disc was bent.
Me thinks that the fourth bolt got sheared off somewhere. Could this damage be related to the axle eating up the inside spacer? Could be. I straightened the disk back flat. The finally took the tarp off my new-to-me metal lathe and oiled her up. Used an old bolt from a previous project to create the missing bolt.
First, I trimmed the head down to about half its thickness. Then turned it around and removed enough of the bolt to get to a 3/8" diameter.
Then, I cut the taper (on the lathe) and threaded it (by hand).
Was pretty pleased with my first lathe project. Wow! I've got alot to learn on that tool.
Assembled some major components, so it's starting to go back in the other direction now, which is a good thing.
The clutch shaft needed cleaned up before I could put the torque tube back on. Got to looking at it and noticed only (3) bolts holding the flange/disc/shaft assembly; I'm missing one. Looked for it, but didn't find it. Thought it may be in one of the many boxes containing parts, but no. Took the assembly apart and that's when I really noticed the disc was bent.
Me thinks that the fourth bolt got sheared off somewhere. Could this damage be related to the axle eating up the inside spacer? Could be. I straightened the disk back flat. The finally took the tarp off my new-to-me metal lathe
First, I trimmed the head down to about half its thickness. Then turned it around and removed enough of the bolt to get to a 3/8" diameter.
Then, I cut the taper (on the lathe) and threaded it (by hand).
Was pretty pleased with my first lathe project. Wow! I've got alot to learn on that tool.
Assembled some major components, so it's starting to go back in the other direction now, which is a good thing.
- Started reassembly.
Stanton
-
ricky racer

- 10+ Years
- Posts: 6348
- Joined: Wed Sep 12, 2007 8:40 pm
- Zip Code: 49120
- Circle of Safety: Y
- Location: Niles / Buchanan, Michigan
Re: New to Me Farmall AV
You're a wizard!!! 
1929 Farmall Regular
1935 John Deere B
1937 John Deere A
1941 John Deere H
1952 John Deere B
1953 Farmall Cub
1935 John Deere B
1937 John Deere A
1941 John Deere H
1952 John Deere B
1953 Farmall Cub
Return to “Farmall A, Super A, AV, 100, 130 & 140”
Who is online
Users browsing this forum: No registered users and 2 guests


