John Deere 60 repair

cjet69

501 Club
This is not my tractor, but I have been given the task of repairing, reassembling, and get it running. It belongs to a cousin who got it when his dad passed away. His dad, my uncle, had torn it down for repairs after the fan shaft came loose and ate the radiator. This happened decades ago, and the tractor has been sitting in my cousins shop ever since. We towed this to our shop about a year ago with the understanding that it would be a no rush job. The hard part with this job is most of the bolts are spread all over my cousins shop so I will need to a lot of searching to identify what goes where. Fun, Fun, Fun!!!!

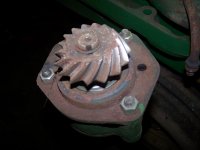
I tore the radiator apart just after bringing the tractor over last year and started cleaning parts in the e-tank. Also pulled the governor housing off that already had the gears removed. The last couple days I started cleaning up the governor housing, disassembling the governor shaft to install new bearings, and cleaned up the top of the crankcase where the governor mounts. Figured I should spray some paint for him while this is accessible before reassembly starts. Anyway, this is a start, and we will see how it goes. I made a video slide show with some of the pics I have taken so far.

[youtube]XE9TFjDaMYU[/youtube]
 
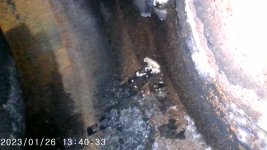
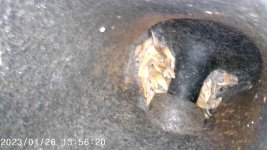
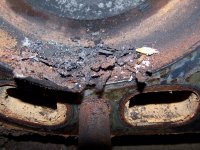
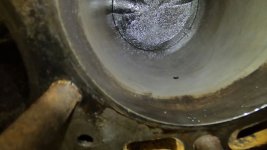
Since I got myself a borescope, I figured I should pull the plugs and take a look inside this engine since its been sitting in a damp shop for decades. Looks like the rodents got in the open exhaust and intake ports and brought some seeds and other debris with them. The bores look a bit rusty and could use some cleaning and I would like to get a good look at the valves to see if the rodent **** has pitted the face of the valves and seats. I would like to pull the head but need to ask my cousin if he wants me to go that far. I see it as this would be the time to do it since its already torn down to this point. Just need a head gasket. The pics show the rust in the bores, carbon laying in the bottom, debris on an open valve, and rust in the combustion chamber in the head. The last 3 pics are one down an exhaust port thats completely filled with rust and the 2 intake valves with the mouse goodies in them.

PHO00000.JPGPHO00002.JPGPHO00003.JPGPHO00007.JPGPHO00008.JPGPHO00011.JPG
 
I will enjoy watching your progress....I revived a 49 B from the dead and liked the process and love the end result.
 
That’s a bit of a mess! I hope he allows you to pull the head, it really needs to come off for a good cleaning and valve job.
 
I don't think I could bring myself to not pull the head off to clean and inspect the head and bores. From my experience, I'd also pull the pistons out and replace the rings. I don't know if the 60 used replaceable rod bearings or if they are shim-able like those on my A or B's are. With the amount of work you are putting into this build, it would be a shame to have it be down on power and burn oil due to worn rings or carry low oil pressure due to worn bearings. I rebuilt a B one time and the rings had a 3/8" end gap! It still ran but didn't have a lot of power and it burnt oil.
I haven't worked on a 60 before but the older A's and B's used lead washers to seal around the cylinder studs so that's something that's a bit different and something you don't want to overlook.
 
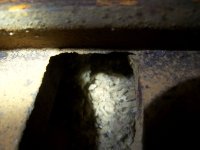
A little more investigating and I found a mouse nest in the water jacket of the block right between the 2 cylinders. This is looking down into the big rectangular opening on the block in the last pic.

100_4687-m.JPG100_4688-m.JPG100_4689-m.JPGGOPR3503-m.JPG
 
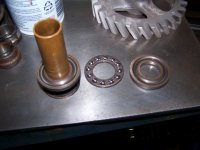
Finished cleaning up the governor shaft and gears. I used the bead blasting cabinet to remove the light rust on the gears and the shaft is now ready for assembly. The 2 shaft bearings will be replaced, and the thrust bearing is good with just a lite cleaning. I already have the governor housing stripped and ready for primer so I moved on to the fan shaft and managed to get most of it stripped of paint. Should be able to finish it up tomorrow so it can be primed also.

100_4659-m.JPG100_4674-m.JPG100_4676-m.JPG100_4677-m.JPG100_4682-m.JPG
 
I got the go ahead to pull the cylinder head off. With everything out of the way this is the time to do it.
 
lookin good so far!! I have Dads 730-d-es tractor and a 50 B, 56 420-w loader/backhoe, and the 420-c crawler loader. I kinda grew up on the green ones!
Keep the progress pix coming!
 
Just got back in from pulling the head. The shop is cold, 36°F on the old thermometer, and I didn't want to waste wood and propane for 1/2 hour of work. Glad I pulled it with all of the crud in the cylinders and ports. A lot of it is carbon, but also quite a bit of rust granules. Big pile of rust came out of the exhaust port when I turned the head over. It was stacked up against the exhaust valve where could have easily fallen into the cylinder if you turned it over. Everything I see so far should clean up pretty easily and I just need to pull the valves to check out the seats and faces.

100_4703-m.JPG100_4723-m.JPG100_4725-m.JPG100_4726-m.JPG100_4729-m.JPG100_4730-m.JPG
 
I got the shop warmed up a little and thought I would see if I could clean the rust out of the cylinders. After rolling the engine over I found the rust was limited to the area above where the pistons had stopped in the bores. I decided to try some Ospho on a shop towel and some scotch brite. It worked great, cutting thru the rust with ease. After cleaning I wiped it all down and shot a good coating of WD-40. This will all get a good cleaning before assembly starts. I also sucked up the big mouse nest in the water jacket. It was bigger than I thought. I then moved to the head to start removing valves. First valve I tried is stuck. This is an exhaust valve that had all of the rust and debris in the port. I'll get some penetrant on it and see if It will loosen up without any damage. I think it will if I take my time. Probably a good thing that I didn't roll the engine over before I took it apart or I might have bent a pushrod.

100_4761-m.JPGGH013515_Moment-m.jpgGH013516_Moment-m.jpgGH013520_Moment-m.jpgGH013521_Moment-m.jpg
 
Looks good. Have you measured the bores yet? It looks like there's a fairly good gap between the pistons and the cylinder walls...
 
With the pile of rust poured out of the exhaust port I sprayed some WD-40 down the port last night hoping it would coat the valve stem that you can't see. Today I took my borescope out to see what the valve stem looks like. Not Good. I put some acetone/ATF mix on it so we will see if that works down between the valve and guide. Hopefully the rust didn't go up the guide to far.

PHO00102.JPG
 
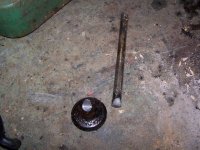
Well, we have the first casualty in this project. After many attempts trying to get this valve out it finally started moving but got really tight again. While trying to push it back the valve head snapped off. Must not have had things squared up. Anyway, with the damage already done, I got the stem pushed out. Lots of dry looking rust in the guide. Probably need to get both the valve and guide but I will clean it up first to see what shape the guide is in.

100_4767-m.JPG100_4768-m.JPG100_4769-m.JPG
 
Wire brushed the valve seats. The bad exhaust valve seat looks a little rough, but I think it will clean up. The other exhaust seat has a little pitting that will clean up just fine. The 2 intakes look nice. The pics in order are bad exhaust, intake, intake, and exhaust.

100_4770-m.JPG100_4772-m.JPG100_4773-m.JPG100_4774-m.JPG100_4776-m.JPG100_4779-m.JPG
 
Back
Top