I’m back and I went Big!

gitractorman

501 Club
Hey guys,
Been off the forum for a while. Had to sell all my cubs a few years ago when we decided to move. I just acquired a 1946 M and will be playing with it for a while. Found it in a fence row and some gas and she fired right up. Has lots of little issues and a really old repaint with Super M decals, but she runs pretty good. So, I’ll be hanging around the M forum for a while. First thing is to get some rubber under her so I can move it around without having to pump up tires every time.

I’m currently without a computer (between jobs) so will post some photos when I can.

Thanks,
Bill
 
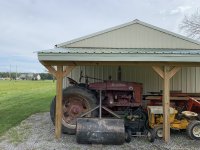
I'm finally settled back in my new/old job, and thought I'd upload some photos. The first one is at the farm where we picked it up, it's running in the photo!

SmallIMG_0010.jpg

This next one is at home with my youngest son driving:
SmallIMG_0024.jpg

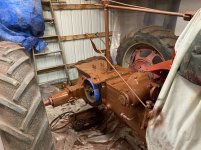
And here she is temporarily parked in the lean-to. That was a few weeks ago, it's now in the barn and in partial disassembly.

SmallIMG_0013.jpg


I've decided to take this one slow, start in the front and tear apart, fix/replace, re-paint, etc., and move towards the rear. Boy, this is a LOT bigger than a Cub!!!

Thanks again for all the comments.
Bill
 
Have fun, and enjoy. I think you have my hood. Bought a Super- M this past spring and it was badged as an M, ha. Found about a half dozen small problems that were corrected and that old girl runs pretty sweet now. Thanks for sharing good news with pic's.
 
Stanton,
Thanks for the link. It's been a while since I posted and you used to have to load to photohost then do the links, so now it's obviously a lot easier to just add attachments.

So, decided to take this one from front to rear, basically taking off, replacing/rebuilding, cleaning and painting as I move to the rear. Took the front wheels apart and ground those down and have them primered and will paint them later today or tomorrow. Need to replace the bushing in the bolster so I'll tear into that this weekend.

Since I know the electrical things could take a long time, I started with taking the 6V generator to my buddy Dennis up at Ray's Auto Electric in Niagara Falls. Great guy!!! His dad started this shop in the 1940s, in a 2-car garage attached to his house, and Dennis has kept it going, so I love supporting him and taking anything to him that I can. He's rebuilt a ton of Cub Cadet starter/generators for me, and a few Cub starters or generators over the years, but I've also taken boat starters, alternators, electric lift motors, and basically anything like that that I ever need work on.

I dropped the generator off on Monday and asked him to first just check it out to make sure it's worth rebuilding, then let me know. This was going to be the deciding factor if I was going to switch to 12V or not. Well, Dennis called me yesterday and said "Bill, you're all set". So I asked if the generator was ok to rebuild or was it junk. He says, yea, it's all rebuilt and done and I just painted the case, you can come pick it up anytime! What a surprise, 1-day turnaround!!! So, this morning I pulled the magneto and starter and will drop them off at lunchtime when I pickup the generator. Guess she's going to stay 6V, which is nice because I really didn't need any more to do! Now I guess I better get moving on the rest of the tractor...

Thanks again,
Bill
 
You probably already know, but since you are rebuilding electrics, it's important that the battery cables are a large gauge...many folks use welding cables since they are quite flexible. Also, avoid the clamp on connectors.
 
Dale,
Yea, I was just looking closer at the wiring on this thing and WOW it's simple!!! I'm planning to replace everything including the battery cables. There's just a single wire from the generator to the ammeter, then just a little wiring from the ammeter, on/off switch, light switch, etc. I'm going to rip it all out and start over since it is so simple, and battery cables are on the list.

Thanks,
Bill
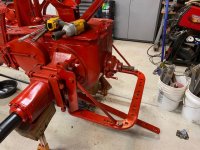
 
Got a lot done over the weekend. Tore into the front end, cleaned and painted things and have a bunch of parts in order now. There was a little slop in the front end so I ordered the lower bolster bushing. Other than the 70 years of grease and crud everything looked pretty good.

7EB9893D-8E36-40AB-A0E2-13895E47A875.jpeg


Attachments

  • 163F0216-FE1B-47FB-B843-E10E616D81D2.jpeg
    163F0216-FE1B-47FB-B843-E10E616D81D2.jpeg
    108 KB · Views: 3,662
  • A75F9DF5-CDB1-461E-BCBE-4469B61DD0EE.jpeg
    A75F9DF5-CDB1-461E-BCBE-4469B61DD0EE.jpeg
    104 KB · Views: 3,662
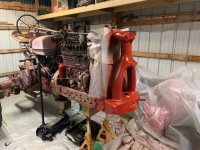
So, I've been getting a little time in the shop, about 6 hours last Saturday, and 12-hours this Saturday, and I've made a little progress! A couple of weeks back I realized I needed to build an enclosure around the tractor so I could attempt to keep the rest of the barn dust free. So, now it's "bubble boy", although the boys think it looks like I've setup a meth lab when the garage door is open.

IMG_0175.jpg
IMG_0176.jpg
IMG_0183.jpg
IMG_0184.jpg
IMG_0186.jpg
IMG_0189.jpg
 
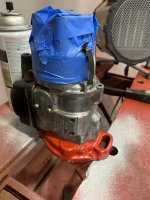
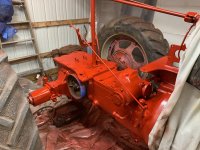
This was a big step in progress. Cleaned/primed/painted engine block, reinstalled valve cover, painted cast portion of mag and clear coated the aluminum, rebuilt and repainted the carb, reinstalled the tricycle assembly with new bushings and oil seals and new front tires, reinstalled oil pan, installed mag. Yea, 12-hours in the shop gets A LOT done!!!

IMG_0190.jpg
IMG_0191.jpg
 
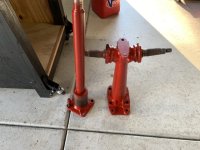
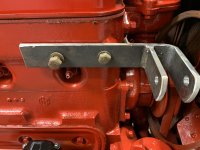
So, just a little update. Got a lot done over the past couple of months, but slowed down a bit around the holidays. Here's some new photos, adding the alternator bracket, new rod to actuate the belt pulley PTO, and a little more paint. Have a new brake/clutch pedal shaft to install, and milled out the right side brake and clutch pedals and installed bushings, to get rid of the slop in the pedals. I'll try to get some pics of those this weekend.

Happy New Year to All!
Bill
IMG_0206.jpg
IMG_0226.jpg
IMG_0256.jpg
IMG_0227.jpg
 

Attachments

  • IMG_0260.jpg
    IMG_0260.jpg
    668 KB · Views: 2,573
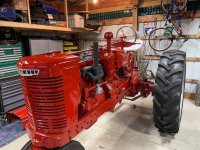
Just a little update. I've got everything just about done on the M and she is really coming together. Had a hell of a time getting the rear wheels off, after jacking it up and sitting precariously on jack stands, but I was careful and ended up cutting a few bolts rather than trying to pry on them too hard.
I'm just finishing up the wiring, and need to find a new set of rear rims and tires. The Corona V has put that on hold at the moment, as the wife doesn't want me making any big purchases right now. So, she'll sit for a few more months. The guy doing the tinwork for me hasn't gotten it finished yet anyway, so I might as well just sit and take my time.

Here are some updated photos.
Thanks,
Bill
IMG_0445.jpg
IMG_0447.jpg
IMG_0453.jpg
IMG_0454.jpg
 
I have another question about the drawbar. Where it mounts to the tractor under the belly, is that hole in the drawbar supposed to be oblong, so it can pivot to different locations on the back of the tractor, or is mine just worn from years of use? You can see in that last photo that it will pivot almost all the way to the ground. I know the pin is just a little worn, but the hole in the drawbar itself is really oval. I may weld it back up a bit and drill it back out to take some of the slop out of it.
Thanks,
Bill
 
I'm not the final authority on that question, but I'd say the answer is round. Hasn't the hole in the back end already been repaired?
 
Happy 4th of July to all. I was able to finish up the M (well, mostly), with my dad's help while they were visiting this weekend. Here's the mostly finished product:
IMG_0611.jpg
IMG_0613.jpg
IMG_0614.jpg

I still have a few little items to add, clean up, etc., but I'm really happy with how she turned out.

Thanks,
Bill
 
Back
Top