Curt's 1955 Farmall Cub, SN 192959

Chipmaker":x8k4iyph said:
Looking good, I read in one of your other post you were going to weld up the light holes in the hood, do you plan on doing the two for oiling the generator as well since you switched it to an alternator?

I don't believe the 55 Cubs had the generator oiling holes.
 
indy61":2vzcn7ni said:
Chipmaker":2vzcn7ni said:
Looking good, I read in one of your other post you were going to weld up the light holes in the hood, do you plan on doing the two for oiling the generator as well since you switched it to an alternator?

I don't believe the 55 Cubs had the generator oiling holes.

Didn't know that, what year did they stop putting them in?
 
Chipmaker":2rikh2o6 said:
Looking good, I read in one of your other post you were going to weld up the light holes in the hood, do you plan on doing the two for oiling the generator as well since you switched it to an alternator?

Actually, my 55 does not have the generator oiling holes in the cowl. I held off doing any welding on the hood (didn't feel like purging the fuel tank.) I still have lots of sheetmetal work to do on the grill and cheek pieces. Next year, when everything is cleaned up, I'll strip all the paint off the tank and have it shot with automotive urethane (partial to PPG Deltron, but I haven't done auto paint in years.) I might even fork out a few buck to have a local auto-body shop do the fenders, hood, and grill all at the same time.

In the interim, the Cub is back in it's natural habitat... hauling stuff around the farm. This morning's task is a pile of pine branches that needs moved out into the field and disposed of.

Cub_20160902_sm.jpg


I was never into the ATV thing... for me, the Cub is the ultimate ATV :)
 
More of the Cub-22 Mower jigsaw puzzle assembled. Had to make a few bits on the lathe this morning (A few of the pins had been replaced with bolts and jammed nuts, so I made new pins.) Got to scrounge to find those funky bolts used on the ledger, the ones with beveled square heads, before putting the blade on.

Cub_22_Mower_20160904_sm.jpg
 
Great job, Curt!

The pictures really help this new Cub owner to see where things are and what is involved getting to them and removing them, as well as putting them back!
 
No sweat, glad it helps. Though, take what I've done with a grain of salt... I put mine back together pretty much the way it came apart, but I've discovered mistakes made by my grandfather and father over the 60 years this Cub has been around the farm. Quite likely I've made a few of my own (I hope not, but you never know.)
 
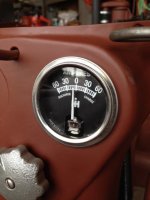
Hey Curt, I got my alternator in like yours. Do you mind sharing with me how you wired it up? I know the nut lug goes to the amp gauge but what about the plug? Are both connectors used & what are they hooked to?
 
Chipmaker":31gitv16 said:
Hey Curt, I got my alternator in like yours. Do you mind sharing with me how you wired it up? I know the nut lug goes to the amp gauge but what about the plug? Are both connectors used & what are they hooked to?

Ok, the lug with the nut is the alternator output. It needs to go to the battery via the starter. I used a pretty heavy wire for that. Alternator is rated around 40 amps output, so I sized the wire accordingly. I swapped the original charging ammeter for a volt meter, so I am not wired the same way. I don't know if you can pump 40 amps through the factory Ammeter.

In order to get any output from the alternator, it needs to be supplied with 12V to power the field. That is what the two spade connectors are for in the "T" socket. One of them is the field (the switched Ignition lead.) The other spade lug is for an optional charge indicator lamp. On early nippon-deso alternators, that had to be connected via a lamp to 12V, but modern ones do not need to be connected at all.

So, in my case, I only have two wires: A big one from the alternator lug to the lug on the starter. Then a small gauge wire between the "I" spade connector to the ignition switch.

Here is what I used as a guide:

Denso_Alternator_Wiring.jpg
 
Thanks for sharing Curt. Luckily I planned ahead when I bought my gauges and got a little bigger IH one :D
 

Attachments

  • IMG_9677.JPG
    IMG_9677.JPG
    78.6 KB · Views: 1,418
In actual use, you will probably never see the full output of the alternator without grounding out the field-test on the alternator. But the wire used should be sized to handle that worst-case scenario to keep from having a melt-down. I think it is a 10 ga wire on mine and it is only about 2' long. Bit of over-kill.

I think you will be happy with the alternator conversion. My Cub gets used about every other day. Short runs, spending a lot of time at idle. It hasn't needed to be hooked up to a charger since I converted it. With the old generator, it wasn't spinning fast enough, long enough, to recharge the battery... so after a few weeks of use the battery needed to be put on a charger. So nice to just hop on and hit the starter.
 
This alternator in this link is a true "1 wire" alternator. You run one wire to the battery and that's it. It doesn't need another wire hooked to it, it doesn't need to be disconnected with a switch when not in use. Plus it's cheaper than the one you got. I bought one like you have and it has to have 2 wires with one on a switch or the battery will drain, ask me how I know, lol. It's also cheaper than the one you got. It has the same mounting brackets as the one you have. I only put this on here for future reference and other people looking for an alternator. This one wire is awesome for those of us running a magneto with no off/on switch with power and not having to add another switch. Thanks for sharing with me Curt!
https://www.dbelectrical.com/products/c ... 12180.html
 
Starting the next phase of the rebuild... dealing with getting the implements ready for use.

Just got the 2-way plow and disc out of the shed (buried behind a bunch of dead law mowers and 3-point attachments.) Now it is a matter of cleaning them with a wire wheel and brushes, as well as getting the moving parts to, well, umm, actually move again.

Plow_and_Disc_20161126sm.jpg
 
May I see more pictures of the back of your cub. I am also looking to tow a trailer, but I don't know what attachments I need to have on the back.
 
Chipmaker":23qehrvj said:
This alternator in this link is a true "1 wire" alternator. You run one wire to the battery and that's it.

Post back later to let me know how it works. It is essentially the same Denso alternator with the field circuits hot all the time. I wonder if it just has a diode between the battery output terminal and the ignition terminal. (Used to do that with GM/Delco SI alternators with the same results) If the current draw from the rectifier is low enough, then your Cub could sit for months without drawing down the battery.
 
gjpgonzo":5z7asewo said:
May I see more pictures of the back of your cub. I am also looking to tow a trailer, but I don't know what attachments I need to have on the back.

Here's what I ended up doing... welding up a 2" receiver hitch to a Fast-Hitch point.

http://www.farmallcub.com/phpBB2/viewtopic.php?f=1&t=93990

There's also an alternative method from another list member that welded tabs onto the receiver hitch tube and pinned it under the drawbar just like the factory tab. Last method is to get a 2" ball with a shank small enough to go through the hole in the factory hitch. It is simple and effective if you just want to tow a trailer and not handle any other receiver-hitch accessories.

You probably want to add a pair of steel eyes as well, to serve as attachments for your trailer's safety chains. I don't bother with the chains (yeah, shame on me) but in theory it is extra insurance should the ball-hitch come apart for some reason.

While trailer brakes are possible for me (my Cub has been converted to 12 volt) you may not be in a position to do that. The 6 volt, positive ground, system of the Cub really isn't conducive to using any modern electrical accessories, like the trailer lights & electric brakes.
 
clm2112":2smkm2c6 said:
Chipmaker":2smkm2c6 said:
This alternator in this link is a true "1 wire" alternator. You run one wire to the battery and that's it.

Post back later to let me know how it works. It is essentially the same Denso alternator with the field circuits hot all the time. I wonder if it just has a diode between the battery output terminal and the ignition terminal. (Used to do that with GM/Delco SI alternators with the same results) If the current draw from the rectifier is low enough, then your Cub could sit for months without drawing down the battery.
So far so good on the Cub I put it on. It had been sitting for about 2 weeks and I moved it the other day with no weak battery. My niece has one on her H Farmall and hasn't had issues with it either and it is a parade tractor so it sits quite a bit, that is where I got the part number from was hers.
 
Back
Top