
Jeff Silvey
501 Club
1. Find a smooth surface to work on, it will help your back. This really stinks in the winter season.
2. Remove the hand hole cover, if you have one.
3. Get a flashlite to look up in the hand hole to see what the fingers & TO bearing look like.
4. Then get the finger to the bottom so you check to see how much adjustment you might need to do.
5. I release the pedal so I can get the tool I use between the TO & finger.
6. Then I get 1/2" wrench to loosen up the nut that holds the adjustment screw.
7. Then with the little rachet screw driver I start turning the screw in till it looks almost flush with the jam nut. (I got mine at some store in TN, store like HF.)
8. Then I use the special tool again to see how the finger looks.
9. Then I go to the next one, I turn everything by the crank with switch off & in neutral.
10. After all three fingers are adjusted then I get the pedal back to where it needs to be 1" from the TO tighten everything up on the pedal. Then take the tractor for a test drive. If everything sounds & feels good put the hand hole cover back on & you are in busniess.
This does take some time so be patient.
Good luck
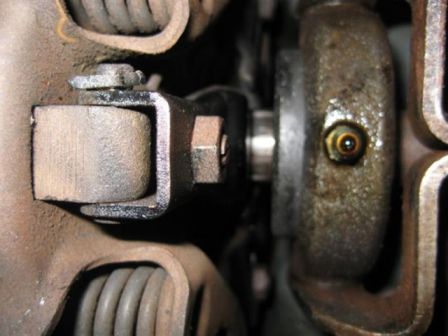
Picture of jam nut & screw before adjustment.
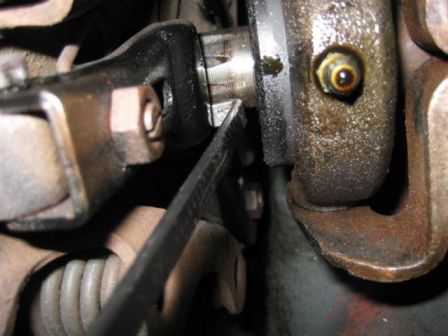
Using the special tool I made. Notice the gap between the tool & finger.
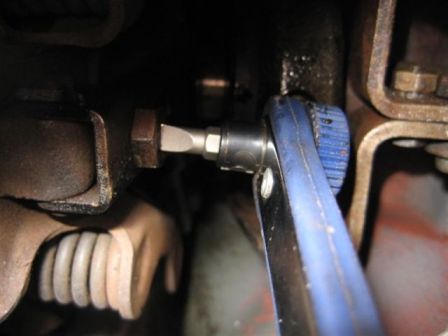
Using the rachet screw driver.
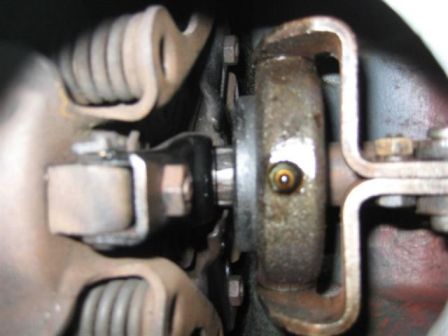
Notice the different on the finger. One is adjusted the on the left is not. Sorry for the blurness.
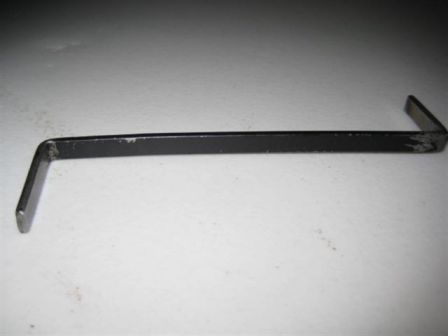
Here the tool I made. Yes it is from an wiper arm.
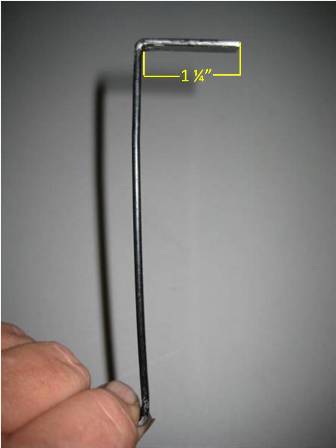
Easy to hold when adjusting. One thing is to mark or paint the end that does the measurement. That way you don't use the wrong end & get the wrong adjustment.
2. Remove the hand hole cover, if you have one.
3. Get a flashlite to look up in the hand hole to see what the fingers & TO bearing look like.
4. Then get the finger to the bottom so you check to see how much adjustment you might need to do.
5. I release the pedal so I can get the tool I use between the TO & finger.
6. Then I get 1/2" wrench to loosen up the nut that holds the adjustment screw.
7. Then with the little rachet screw driver I start turning the screw in till it looks almost flush with the jam nut. (I got mine at some store in TN, store like HF.)
8. Then I use the special tool again to see how the finger looks.
9. Then I go to the next one, I turn everything by the crank with switch off & in neutral.
10. After all three fingers are adjusted then I get the pedal back to where it needs to be 1" from the TO tighten everything up on the pedal. Then take the tractor for a test drive. If everything sounds & feels good put the hand hole cover back on & you are in busniess.
This does take some time so be patient.
Good luck
Picture of jam nut & screw before adjustment.
Using the special tool I made. Notice the gap between the tool & finger.
Using the rachet screw driver.
Notice the different on the finger. One is adjusted the on the left is not. Sorry for the blurness.
Here the tool I made. Yes it is from an wiper arm.
Easy to hold when adjusting. One thing is to mark or paint the end that does the measurement. That way you don't use the wrong end & get the wrong adjustment.