Chasing threads and repairing the seats for new spark plugs.

Dale Finch

501 Club
Well doing some work on one of my '55 Cubs, I noticed there was some blow by around the spark plugs...just some small bubbling. So I decided to clean the seat and install new spark plugs with new washers, hoping to seal the gases.

Unfortunately, there's still a little bit of leakage. Do any of you have any suggestions for fixing this? In doing a little bit of online research, I found this tool...
Do you think this would work? And what size do I need for the Farmall Cub?

seatcleaner.jpg

 
A small drill motor with a cone shaped wire brush chucked in it will also work. A small square of plumbers emery cloth placed over the hole and turned by the drill motor/brush will add a little more abrasive polishing to the seat. I used this method on the AVERY V at LACubfest when we were there a couple years ago to polish the valve seats. JMHO Stan
 
Last edited:
Agreeing with the previous responses including the never seize, I think it looks like a clever tool and probably works pretty well. To your third question, the Cub spark plugs are 18mm.
 
I'm mostly concerned about the condition of the seat... It's rather pitted. When I return from a week-long+ road trip up to the Northeast, I will tackle this head-on and try these suggestions.
Thank you!
 
I'm mostly concerned about the condition of the seat... It's rather pitted...................
Thinking out of the box so here's a suggestion to address the pitted metal. Cut a thin flat metal disc to the correct size from a can top, clean up the area with alcohol and use a thin layer of JBWeld as a filler. Screw a plug in place to position and hold it til it hardens. A little dab coating of oil or a thin plastic cover between the washer and the filler/head will allow you to remove it when it hardens because JBWeld won't stick to oil or plastic.. :giggle: :cool: Stan
 
Last edited:
Thinking out of the box so here's a suggestion to address the pitted metal. Cut a thin metal disc to the correct size from a can top, clean up the area with alcohol and use a thin layer of JBWeld as a filler. Screw a plug in place to position and hold it til it hardens. A little dab coating of oil or a thin plastic cover between the washer and the filler/head will allow you to remove it when it hardens because JBWeld won't stick to oil or plastic.. :giggle: :cool: Stan
That jb weld is great stuff! Just replaced some wheel seals in a Troybilt tiller for someone using it. A previous person had done it and gouged the shaft and the new seal leaked. I jb welded up the gouges and sanded it down smooth and replaced the seal again. Great stuff!
 

Attachments

  • IMG_5752.jpeg
    IMG_5752.jpeg
    121 KB · Views: 23
Thinking out of the box so here's a suggestion to address the pitted metal. Cut a thin metal disc to the correct size from a can top, clean up the area with alcohol and use a thin layer of JBWeld as a filler. Screw a plug in place to position and hold it til it hardens. A little dab coating of oil or a thin plastic cover between the washer and the filler/head will allow you to remove it when it hardens because JBWeld won't stick to oil or plastic.. :giggle: :cool: Stan
The high temperature JB should work well
 
I like that idea of using a thin, very thin, layer of JB weld and just holding it flat with the disc. I might try that. Thanks, Stan!

P.S. I hadn't responded to these posts since I was with my sister on a road trip to the Northeast. Hope everyone's having a good summer..
 
I like that idea of using a thin, very thin, layer of JB weld and just holding it flat with the disc.
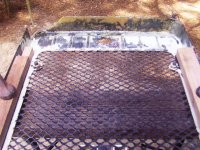
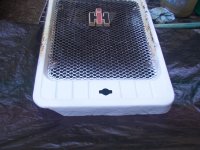
You could try a test first to see if it will not stick to the plastic but I've had good success with JB Weld and fibergalss/resin patch over metal. The pics are a longstripe grill that I repaired by using a piece of florist's styrofoam shaped to the desired contour, covered with a plastic store bag and when it hardened it pealed out without difficulty. You can see in the first and second pic that the lower part was almost completed rusted away. (Also fixed the front rims that you traded with me last year that way). Good Luck Stan
 

Attachments

  • grill6.JPG
    grill6.JPG
    165.4 KB · Views: 11
  • grill7.JPG
    grill7.JPG
    158.2 KB · Views: 11
  • grill10.JPG
    grill10.JPG
    306 KB · Views: 11
If the JB Weld filler approach is used, it might be good to follow up with something like the cleaning tool in the first post. If you can finish the surface down to where the JB Weld is only in the pits and iron is exposed elsewhere, you have a better chance of the plug being adequately grounded.
 
Using a little bit of anti-seize may be all it needs to seal it up if it's just leaking a little bit around there. I'd try that first since it's cheap and easy. If that doesn't fix it then move on to the other suggestions.
 
Using a little bit of anti-seize may be all it needs to seal it up if it's just leaking a little bit around there. I'd try that first since it's cheap and easy. If that doesn't fix it then move on to the other suggestions.
Yup, I was thinking that a dielectric (electrically conductive) grease might be in order for the plug threads. Given Dale's knowledge and background she probably already knows this. JMHO Stan
 
If the JB Weld filler approach is used, it might be good to follow up with something like the cleaning tool in the first post. If you can finish the surface down to where the JB Weld is only in the pits and iron is exposed elsewhere, you have a better chance of the plug being adequately grounded.
Ah! I totally forgot about the electrical aspect! Thanks, Jim.
I guess the best solution is still to use a tool to remove as much pitting as possible. Sealing the threads after cleaning will be important, too, but I think most of the "leakage" is from the washer not having a flat sealing surface. I'll check what I have with my Dremel tool before I order the fancy/expensive plug tool. I guess I could take it to Cubfests for others to use, if I do go that way.

I'll be tackling this again now that I have returned home from a nice wandering up to Connecticut...time to get back to work!! 😉
 
FYI... For expediency, and hopefully successful outcome, I went ahead and ordered the spark plug seat and thread cleaning tool that I pictured in my original post.

I'll let everyone know how it worked, if it does work!! 😜

I can also have it available for others to use it at cubfests if they need it.
 
Back
Top