1A-60 Grader/Leveller Blade Support

  • Thread starter Thread starter EZ
  • Start date Start date

EZ

501 Club
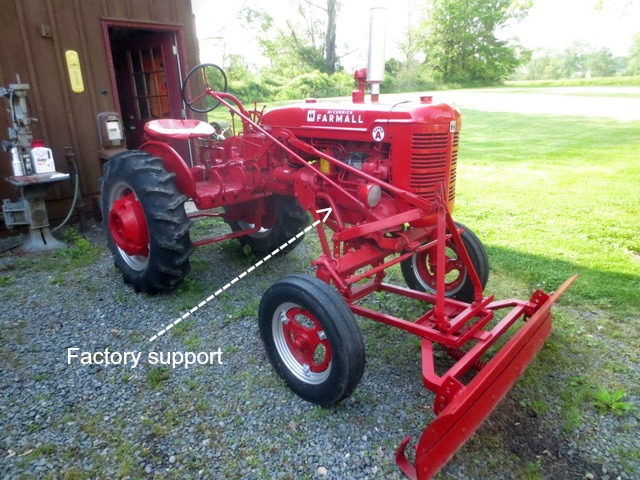
I am presently bolting up a good A1-60 Grader/Leveller Blade to my 130. I noticed in the manual a support tube from the front bolster to the clutch housing. Not to sure how this tube connects to the axle pivot pin, or if it is a modified pivot pin extension.
Has anyone made any home mods to this idea?
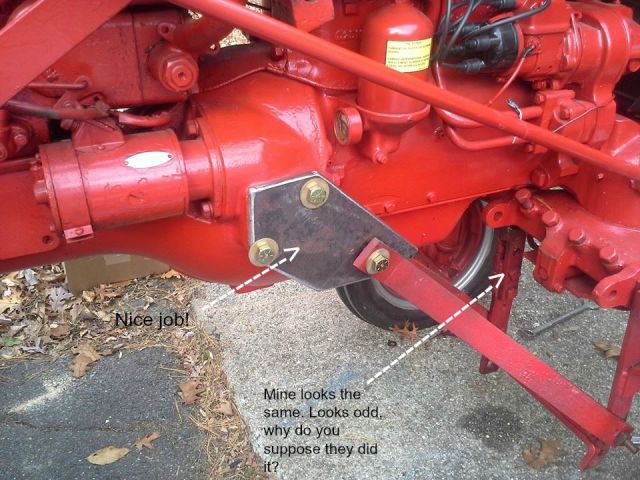
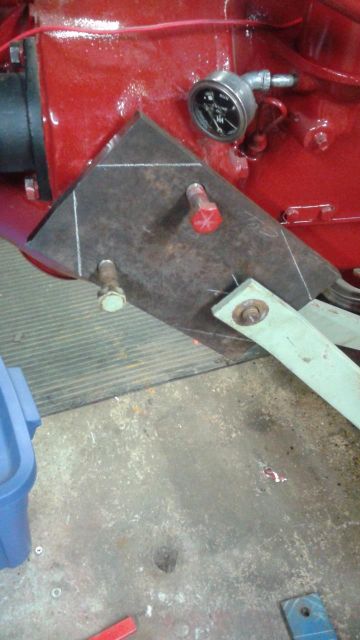
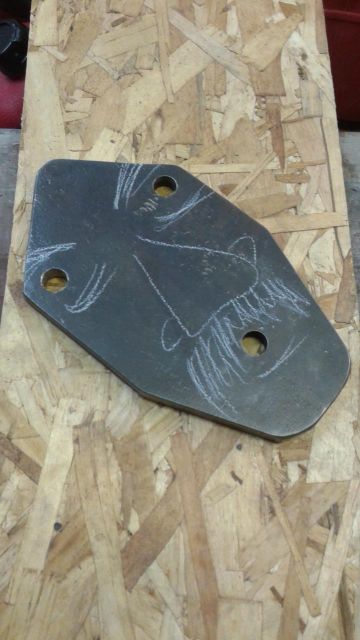
I was thing maybe making something that utilizes the implement bolts location back to the clutch housing.
Attached is a picture of a Super A (Not mine) showing the support tube location.
SnowPlow3.jpg
 
That support tube you are referring to is found on International A/Super A Industrial Tractors. The Farmall Super A tractor that you added in your post also has other parts typically found on Industrial A tractors. Notice the diamond shaped front axle and the small foot pedal for acceleration located between the brake pedals. I have an International A that has all 3 items.
 
What Jeb said. Its a support for industrial models. It reinforces the already heavy duty front axle.

I have the same plow on my SA. The front axle doesn't really take any impact. All of the force from the blade gets transferred to the torque tube, which is why you'll typically find the two mounting arms that sandwich the plate bent. I need to take mine off this spring and hammer 'em back into shape.
 
Thanks guys,
I noticed the industrial axle, but was not aware that the support was an option only on that model.
That said, Mike do you have any pics of your setup?
Looks like I have everything except the big plate that bolts up to the torque tube. I am in the process now of fabricating one with a handy piece of 6" X 1/2" plate.
I am also missing the boomerang, but will try to fab something for that too.
 
I had to fab up a plate as-well. When I bought the plow it was the only piece missing. I can't imagine the boomerang would be difficult to make either.

here are some older photos from when I first got it.

1395175_10201391068353305_2055098086_n.jpg

1385809_10201391069353330_1598119704_n.jpg

1377123_10201377186086257_194299589_n.jpg
 
Is that an anti-rattle spring?
Nice looking Super, with mag, toolbox included in the set.
Have you ever moved it to the middle for grading?
I did that with my Cub. It is amazing how well they can grade.

normal_MikeSuperA.jpg
 
I have the substitute drawbar for mounting it in the center, I just have never used it because I need to retap the final drive bolt hole.

The spring is my semi-permanent solution for the lift linkage scraping up against the grill because they are loose from age and have some slop in them. You can see the damage a little bit on the top photo.

I don't know why the piece, you pointed out looks like that. I've wondered about it myself.
 
Mike,
How do you like the snowplowing performance of your super A?

I was checking out your Pontiac website.
Our family car when I was a kid was an early 60's Parisienne. White, with a blue interior.
That car died sitting in the back yard when I was maybe 12. Dad was not a car guy. He drove for the first 5 yrs. or so with no licence. Ha.
 
Found a perfect piece of stock under a couple feet of snow. ( I knew I would need that some day )
Holes drilled, marked for cutting to size. Need a new blade for the chop saw.

normal_bracket.jpg

normal_bracket~0.jpg
 
EZ":2n61y9w7 said:
Mike,
How do you like the snowplowing performance of your super A?


Didn't see you post this. I like it. Works very well. I don't even use chains. I seem to always get away without having to use them as long as I get momentum going.
 
Farmall_140_Tractor_front_push_blade_mounting_plate_grande[1].jpg

I found this online for the part, but they wanted $55 for it. I am sure I can get it made cheaper if the dimensions were available so I can mount to my 140
 
ccd,

I do not have a drawing, but if you measure the mouting hole centers on the bell housing, you should be good. Also bring the lower blade support arms up to center, mark it and you have your fifth hole. As you can see in my pic above I only drilled 2 holes, but you can drill all 4 if you like. The steel I used was about 1/2" thick.
 
Back
Top