

The Cub has been changed to 12 volts, with an alternator, and a Battery Ignition unit.
IH used none of those in 1949 on Cubs. The parts are more modern than the 1949 system, and nothing wrong with using them.
The owner's manual I posted on the page before this one, shows what they originally looked like.
http://farmallcub.com/rudi_cub/www.clea ... age-33.jpg
Nowadays they use a timing light for timing the Battery Ignition unit. The Cub service manual says the Battery ignition unit is timed like I wrote in the post on the page before this one.
I would buy a timing light at NAPA or somewhere for it.
You only need 1 timing mark to time it, like I wrote on the page before this one.
A 1949 Cub came with 1 timing mark on the pulley.
You can check to see if the spark advance is working, using the timing light, like I wrote on the page before this one.
You can guess at where the 2nd mark would be, it is not a necessity that it is there. Only the TDC mark is needed for setting the timing.
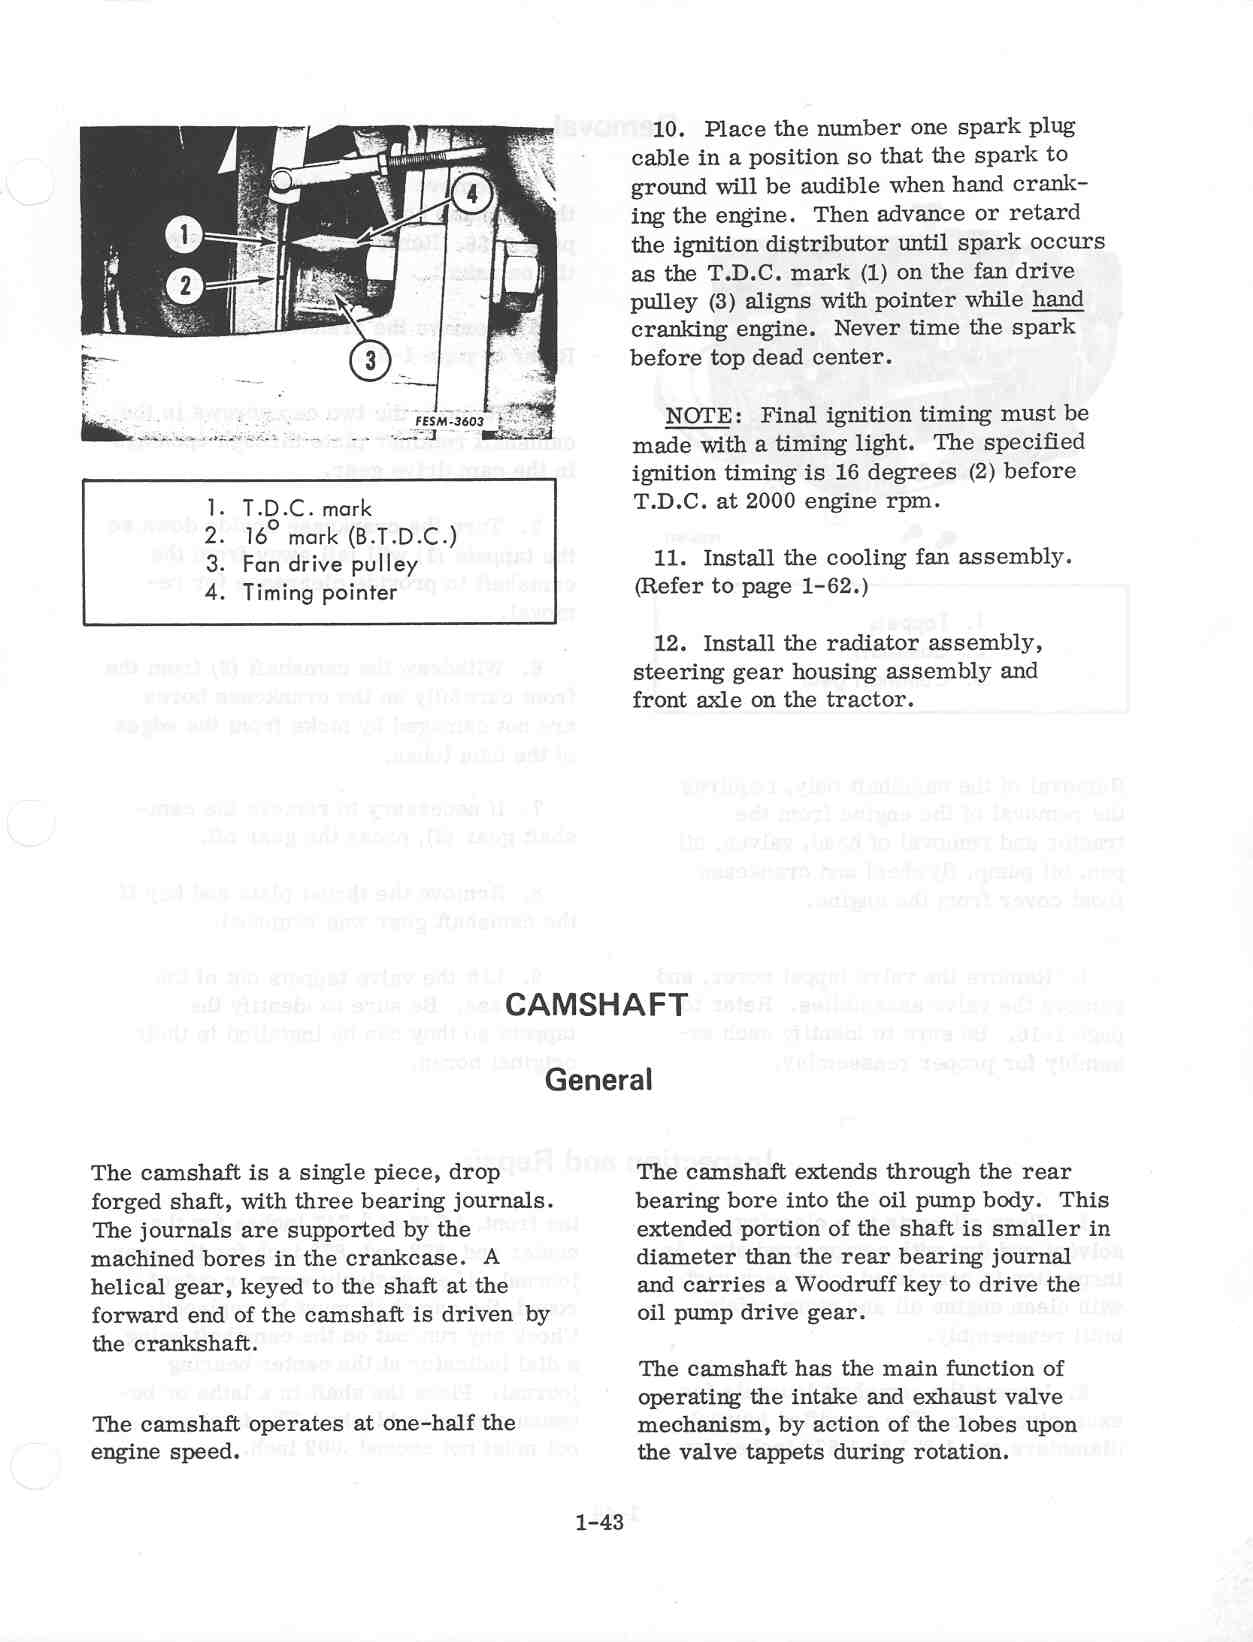
Below is a page from the Cub service manual showing the pulley with 2 marks, you can use the pic to guess where the 2nd mark would be. They are numbered there.
They are talking about other subjects on the page, only the pic and the words below it are needed.
http://www.farmallcub.info/manuals/gss- ... 001-43.jpg
Maybe you are not done with it yet, but the fan shroud has no screws holding it on, in your pic, on the right side. It uses 4 screws to hold it onto the radiator supports.
While you have the hood off, look at the slotted holes on the rear of the alternator, if they are dirty or plugged, use air and blow them open.
I have a tractor with a Delco alternator, and the holes on the rear get plugged with dirt. There are parts inside the alt that need air flow. The dirt will blow out the front of the alt. Use your safety glasses when using the air.


