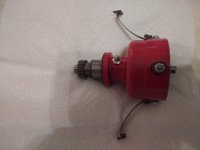
Distributor question

This grease fitting in the distributor thing got me to thinking. I took a look at what exactly the manual says. Randomly opened a 1955 manual in the Owner's Manual section. It says to "Remove the grease plugs and insert lubrication fittings."
In neither the lubrication section, or in the referenced maintenance section, does it tell you to take the fittings out and reinstall the plugs. I find this very odd in that practically every other lubrication procedure tells you to remove the plug, perform the lubrication, then reinstall the plug.
Something for the Correct Police to watch for; It seems to me that a Cub with the plugs in hasn't been maintained "by the book" or is less than six months old. Unless it's restored "exactly the way it came from the factory" I guess.

Dale Finch":vk56sfz1 said:
......Sometimes I wonder about the PTO Grease fitting, too. Since there is no visible grease exit, it's hard to tell just how much to pump. Seems like extra grease would be pushed into differential housing where it gets mixed with gear oil...or gets pushed out the PTO Shaft Seal?
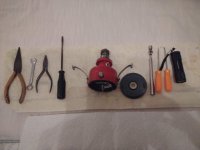
Hopefully you don't lay awake at night wondering about that PTO grease fitting. :lol: The manual says two or three strokes on the PTO shaft. Which I didn't know on my first Cub and I applied 20 or 30 strokes (at least) trying to get it to show somewhere. Well, I finally found it when we had to get into the rear end for a PTO shifter repair a few months later. :shock
 
I finally got the distributor done and re-assembled. Took this long because I had to wait on two parts (the bakelite dust cover and the insulator to the coil connection were either cracked or had chips missing). With the new parts in hand, I put it together this morning. The interior really was in pretty good shape - the springs, etc. were rust and dust free and I very lightly cleaned and lubed them with 3-1 oil, then I pumped grease into the zerk on the shaft until it came out the small hole on the back side (thanks Dale!) and rotated the shaft a few times to work it in. I'll be leaving the zerk fitting installed.

Put in a new set of points and condenser and there it is. Thanks to all for their advice and to Dale for the pictures. Here are a few photos of my final product, before installation on the H and setting the point gap. And a Merry Christmas to all! Jim
 

Attachments

  • IMG_20181224_064110590.jpg
    IMG_20181224_064110590.jpg
    417.8 KB · Views: 1,505
  • IMG_20181224_064252854.jpg
    IMG_20181224_064252854.jpg
    450.1 KB · Views: 1,505
  • IMG_20181224_064208194.jpg
    IMG_20181224_064208194.jpg
    440.3 KB · Views: 1,505
Thanks!

Later today I installed it back on the H and went to set the points using the had crank. Hmmm. I've only had this tractor since last February and never tried to use the hand crank. Well. Found out the starting crank pin was sheared off. I drilled it out okay and gave the crank a try. Hmmm. Seems that it had a bit of rust on the return spring, so much so that I had to hit it with PB Blaster, heat, and a big hammer. Got that worked out finally, but it's always something with these old tractors, isn't it? Gotta love it! :tractor:
 
The hand crank mechanism is definitely something that needs used on occasion just so it stays limber for when you actually need it.
 
Scrivet":1i636mqv said:
The hand crank mechanism is definitely something that needs used on occasion just so it stays limber for when you actually need it.
Yep. I think mine had about 60 years of SC mud caked around it. All is good now. Gotta replace that pin I drilled out though.
 
Jim in SC":1tm8r7xi said:
Scrivet":1tm8r7xi said:
The hand crank mechanism is definitely something that needs used on occasion just so it stays limber for when you actually need it.
Yep. I think mine had about 60 years of SC mud caked around it. All is good now. Gotta replace that pin I drilled out though.
Get something hard. I see to many with a bolt that fits but is always bent.
 
Back
Top