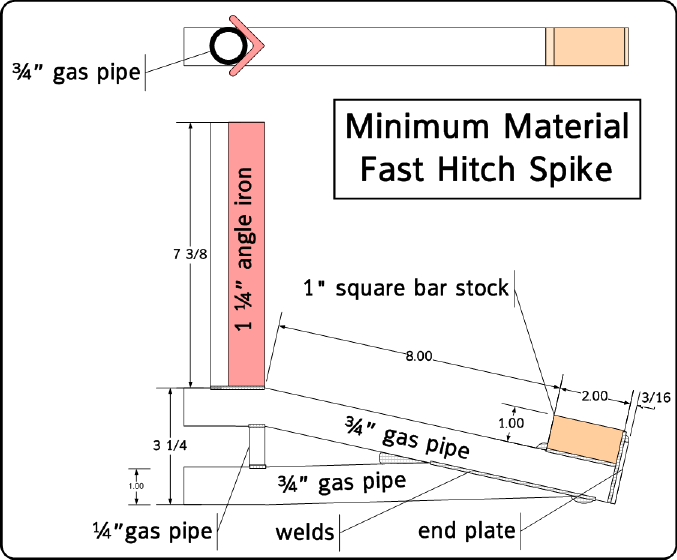
Here is the drawing of the Minimum Material Fast-Hitch Spike using 3/4" gas pipe.
And here is my rendition of this Gas Pipe Fast Hitch spike.
The spike is made out of 2 pieces of 3/4" gas pipe and a piece of 1" square bar stock. The stiffeners are 1/4" gas pipe and are fitted to make the pipes into a rigid beam.
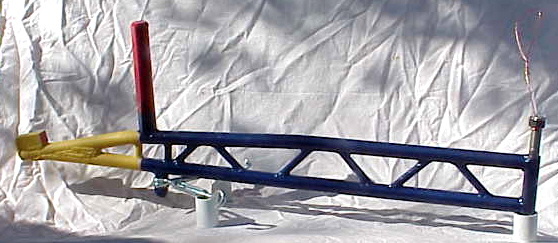
This is the complete Fast Hitch arm based on gas pipe for the structural members.
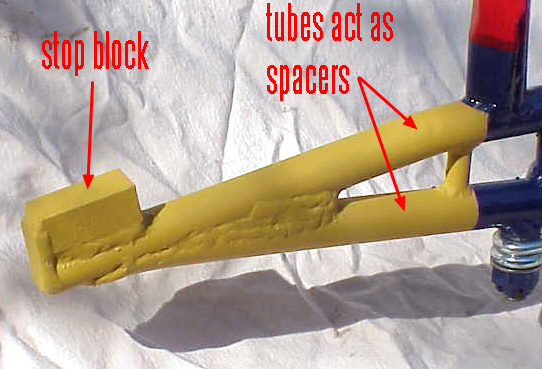
The implement end is another piece of 3/4" pipe and will be the pivot for the rear blade. The vertical support is also a piece of 3/4" gas pipe with a piece of 1 1/4" angle iron attached. This gives a snug fit between the "ears" of the Fast Hitch. The following photos show how this spike fits into the Fast Hitch.
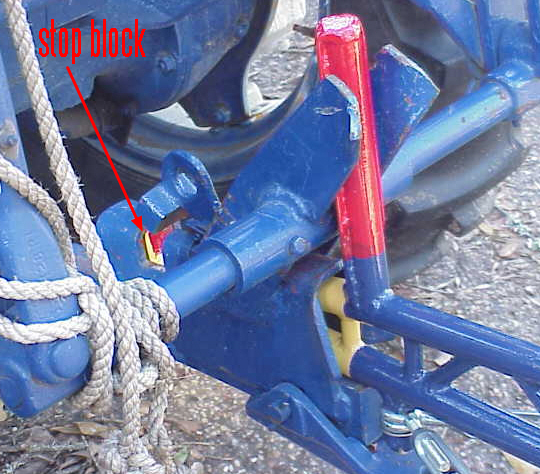
Here you can see the spike mounted in the Fast Hitch on Blue Boy. Also note the face of the stop block where the latch will hold the Fast Hitch arm in place.
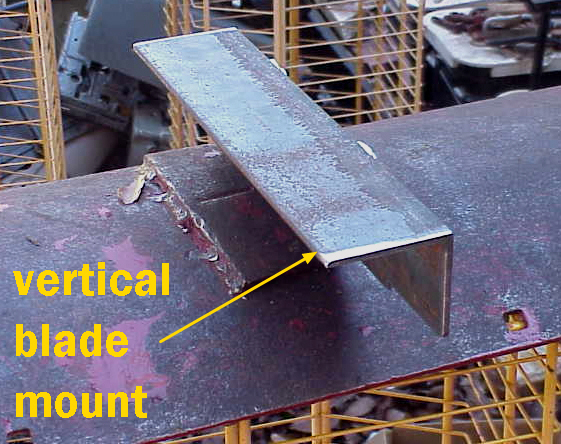
This is a detail shot looking down on the red vertical Fast Hitch member.

Notice how the piece of angle iron fits between the "ears" on the Fast Hitch and the angle makes contact with lateral tube in the Fast Hitch structure.
What to do with this marvelous new toy? Well, I have a 54 blade that was missing some of the mounting pieces. How 'bout making a back blade for Blue Boy? The following photos show the mounting brackets on the blade and how they will attach to the Fast Hitch arm.
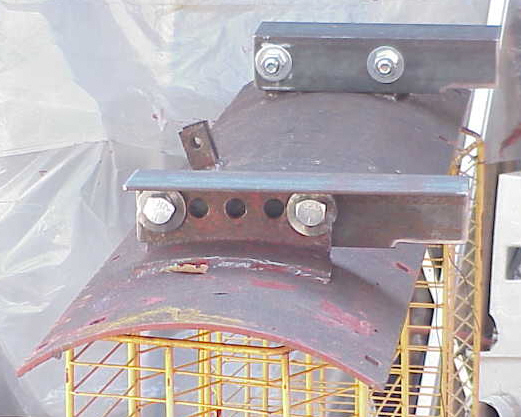
On the back of the 54 blade are 2 curved angle iron brackets with 3/4" holes for mounting the "ANGLE, Support Blade", AKA "that triangular thingy". I used a couple of pieces of angle iron to make vertical blade mounts as shown below. These are bolted to the blade with 3/4" bolts in 2 places on each iron bracket. You can just barely see the bolt heads on the right side of the vertical mount.
Here is another view of the vertical mounts bolted to the back of the blade.
I used another piece of angle iron to tie the 2 vertical mounts together. This horizontal mounting piece bolts to the Fast Hitch arm. Here is a shot of the horizontal mount in position on the blade.
I'm still in the process of welding and painting the blade mounting pieces, but here is a photo of the horizontal mounted bolted to the Fast Hitch arm. Picture the blade hanging down from the horizontal mount, and you will get an idea of where I'm heading. Here is the FH arm with the horizontal mount bolted on.
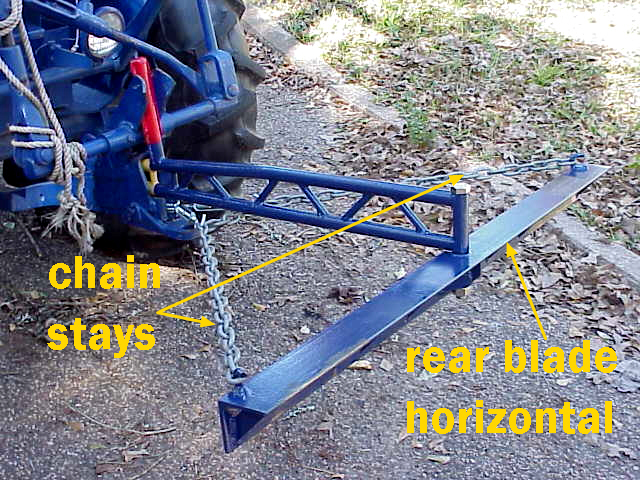
Notice the chain stays and turnbuckles from the ends of the horizontal mount to the FH arm. When the turnbuckles are tightened, the blade will no longer pivot on the center bolt. By changing the number of chain links on each side and adjusting the turnbuckles, it is possible to set the angle of blade to anything your heart desires. If these turnbuckles are not stout enough to hold up to the stress, I have some 3/4" all thread as a backup plan to replace them.
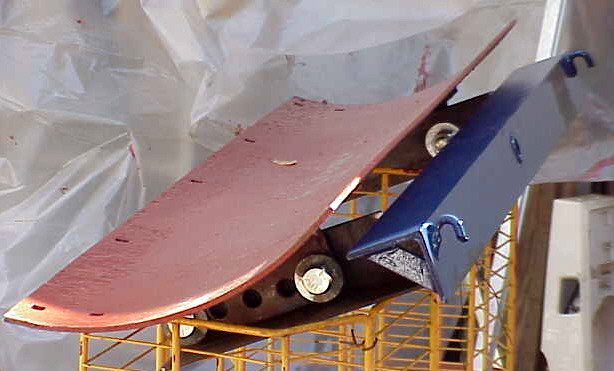
The curved brackets on the back of the 54 blade required wedge washers to take up the slack between the blade bracket and the vertical mount. You can see the amount of mismatch between the straight piece of angle iron and the blade bracket.
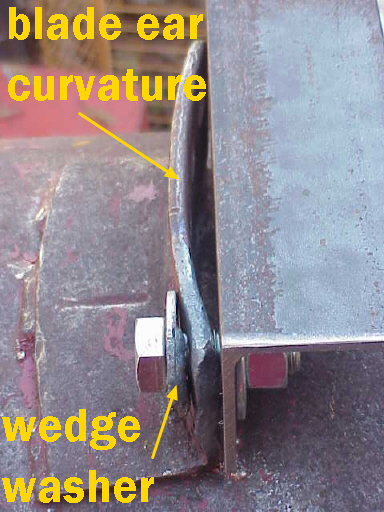
The wedge washers are ordinary 3/4" washers with a build-up of weld metal on about 1/2 of the washer. The buildup is about 1/4" to get the washer to bear on the blade bracket.
So there you have it. It is possible to build a Fast Hitch spike out of gas pipe. It remains to be seen how well it works on this back blade. I will post a picture of the back blade completed and mounted and let you know how well it works.
Rick (Why? Because I can!) Dulas
BTW this is another project built out of scrap picked up from the junkyard.
Total cost for materials is about $5 which is scrap value of the steel.