Disassembly is (obviously) the reverse of the assembly procedure. The only questionable part for me was removal of the expansion plug. I accomplished this by using the belt pulley shaft as a press shaft and pressed both the expansion plug and belt pulley shaft out of the housing using a shop press. Both items survived the operation. This, of course, was done AFTER removal of the drive pinion gear and shaft.
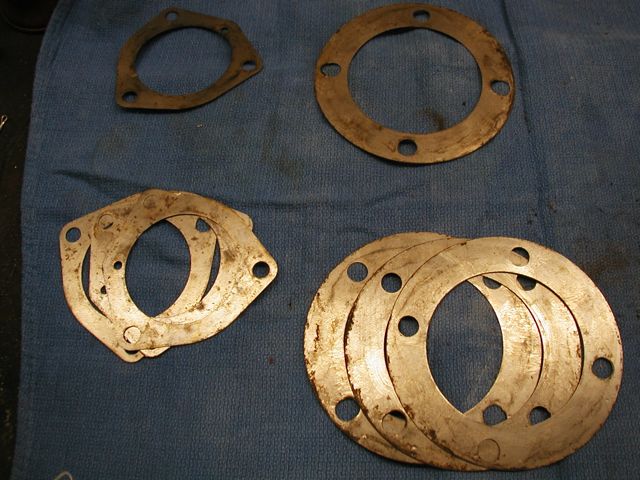
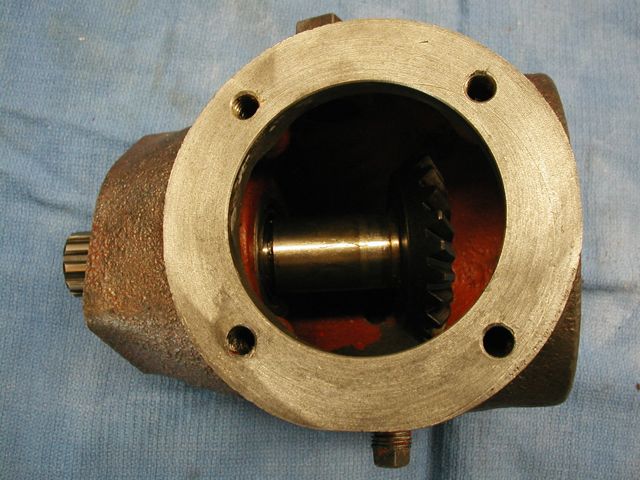
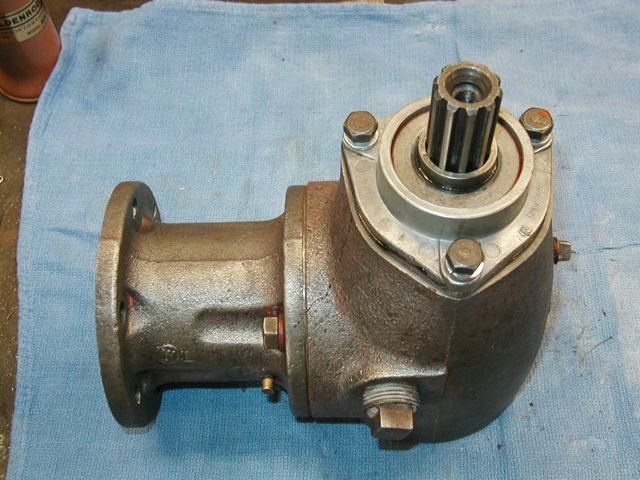
This first picture shows an exploded view of the drive unit including all seals, gaskets, o-ring, shafts, gears, shims, retainers, housing, expansion plug, spacers, keys and fasteners.
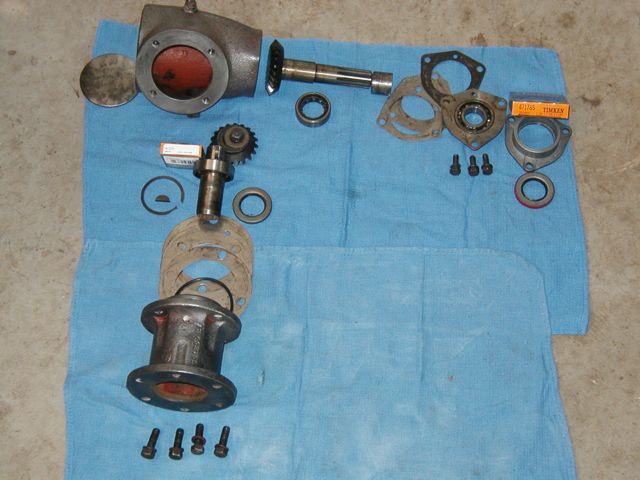
I inspected all parts and found the only ones needing replacement were the two oil seals. I obtained mine from Allied Bearing. (A local supply house in Tulsa).
The p/ns for the seals are: National oil seal 471765 and 441319. (as of 11/30/09).
I first reassembled the unit without the seals or o-ring to check the backlash (play) in the drive unit gears.
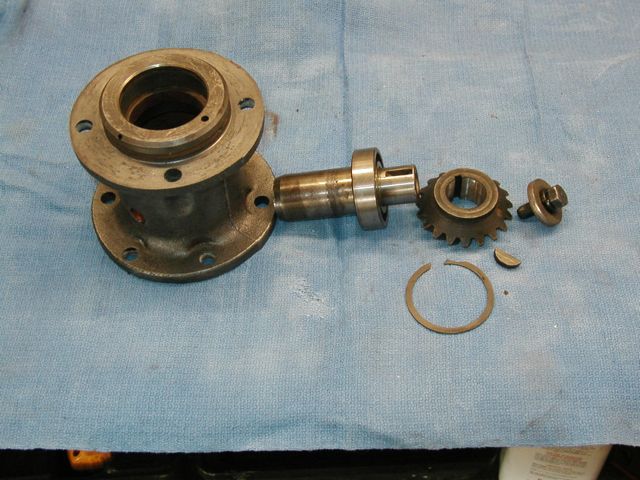
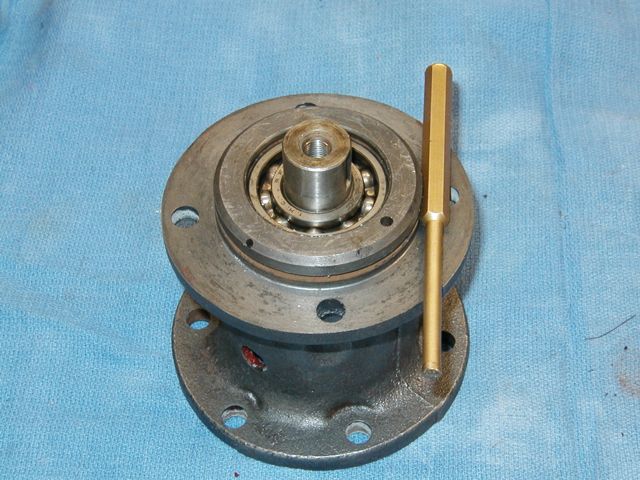
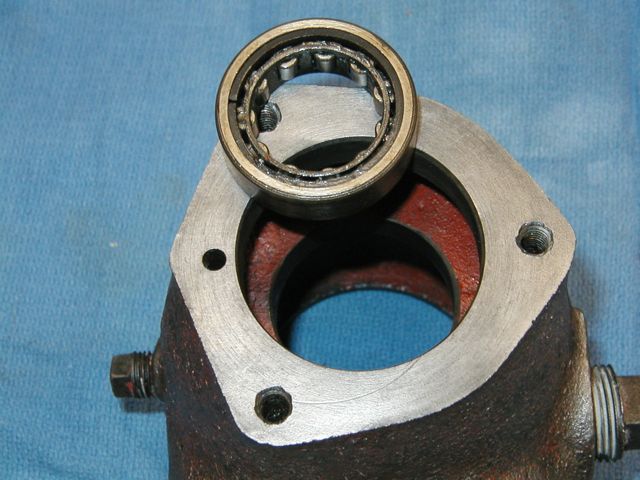
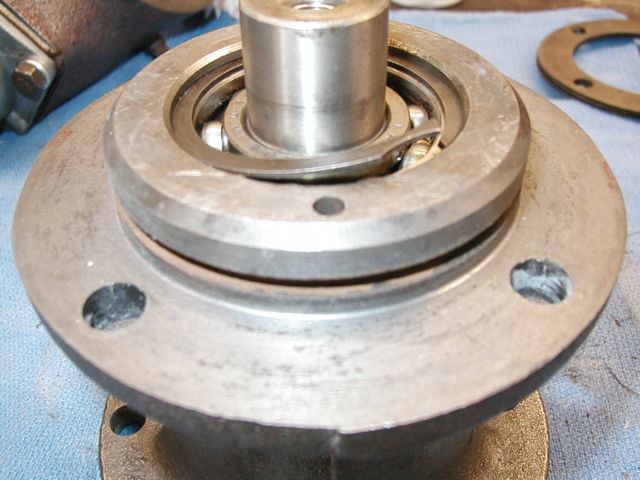
I used a brass pin punch to seat the bearing. Note the o-ring groove in the housing.
Backlash, or "play" in the gears is adjusted by addition or removal of shims. My unit required no change.
I then disassembled the the unit in preparation for final assembly.
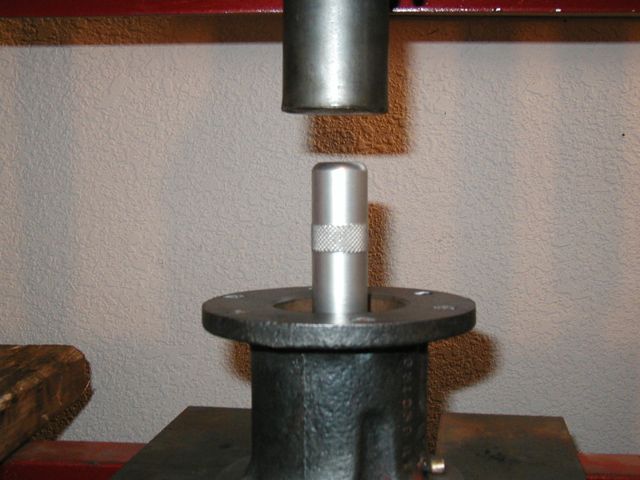
I first pressed the inner belt pulley shaft bearing into the housing.
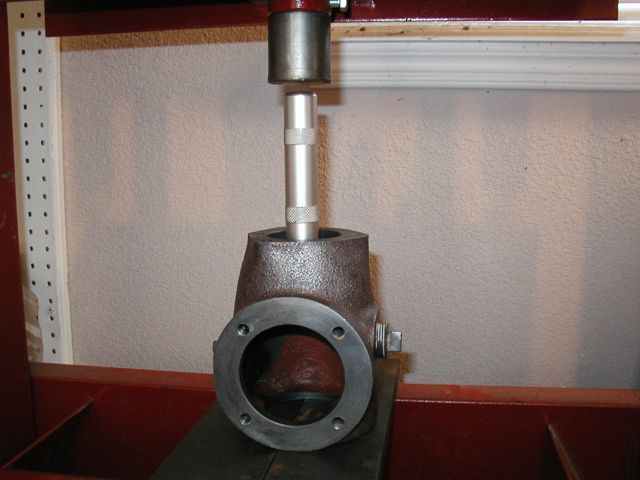
I then pressed in the outer bearing and retainer with shims using a 1" deep well socket as a press collar. Note proper orientation of shims when installing.
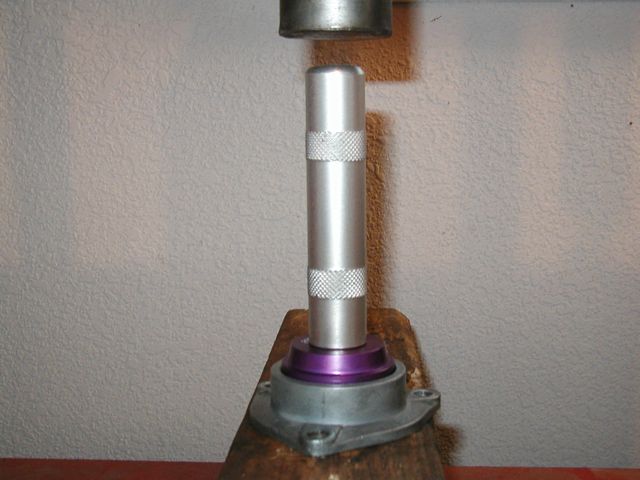
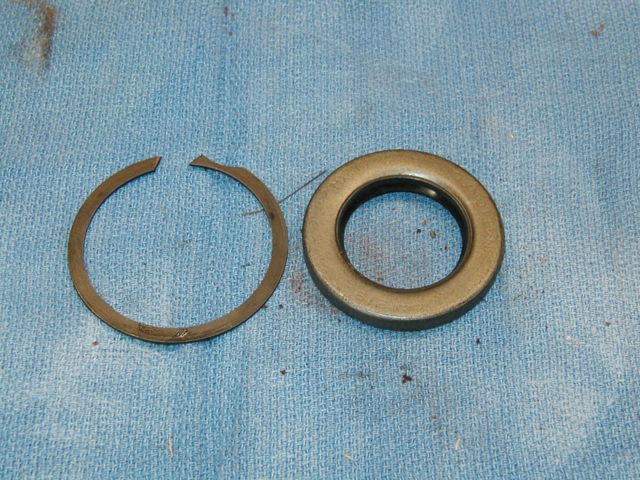
The next step was to press the oil seal into the retainer using my HF bearing race and seal installer in the press. Since the replacement seal is much thinner than the original I was able to adjust the depth of the seal in the housing so it would run on a smooth area of the spacer on the shaft.
Next step was to install the belt pulley shaft.
I then started reassembly of the drive pinion and shaft into its housing.
I first pressed in the oil seal and coated it with assembly lube. Since this seal was also thinner than the original, I was able to adjust the depth so the seal could ride on the smoothest part of the shaft.
The next step was to press in the drive pinion shaft and bearing (after applying assembly lube to the shaft) using a 1" deep sell socket as a press collar.
I then installed the bearing retainer clip.
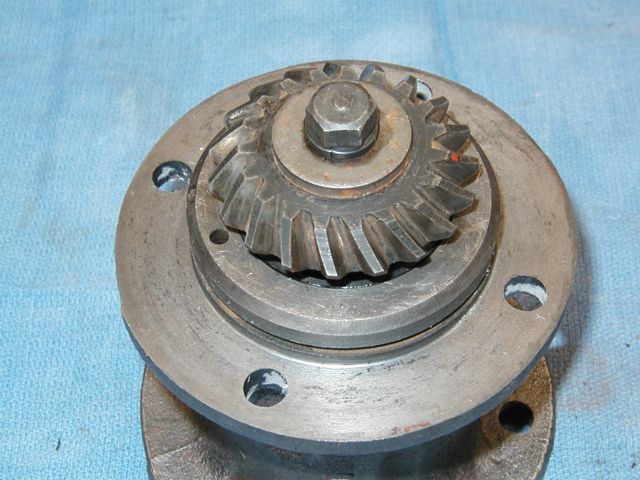
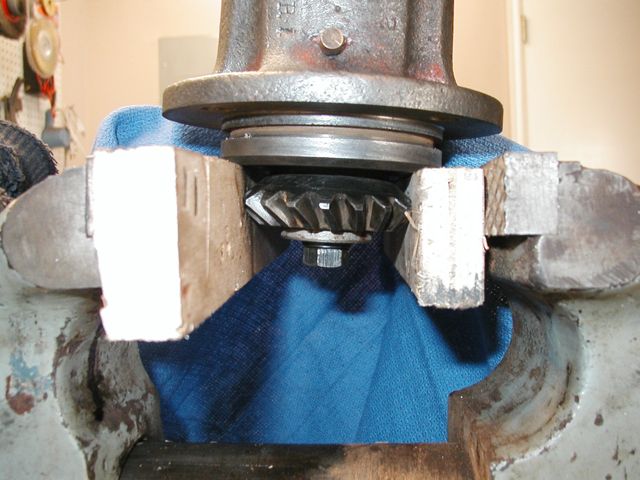
Next was installation of the woodruff key, the drive pinion and the drive pinion capscrew.
The GSS-1411 Manual calls for 35 ft/lbs of torque on the capscrew, so I clamped the pinion in a vise between two pieces of scrap wood and set the torque.
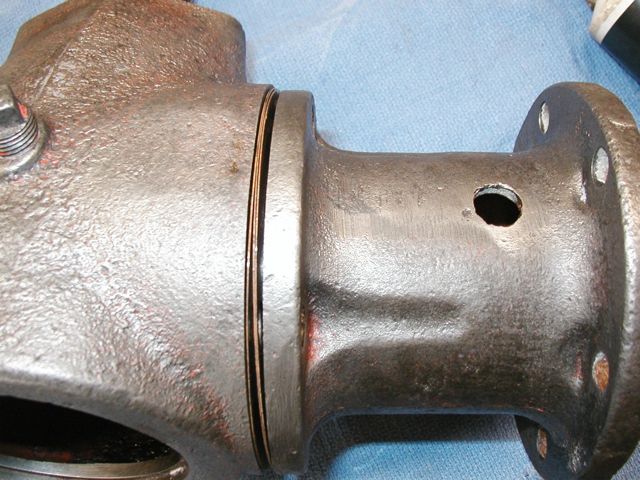
I lubed and installed the o-ring in its groove.
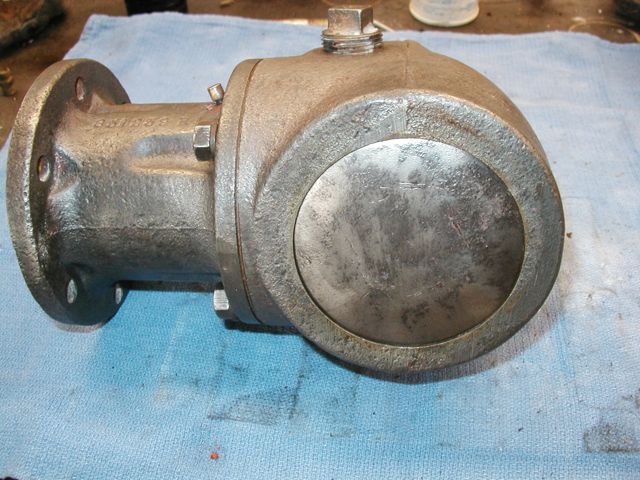
And then installed the drive pinion housing (with shims) onto the belt pulley housing. Please note orientation of the vent (center of picture). It should be up when the drive is installed onto the tractor. I torqued the capscrews to 20ft/lbs.
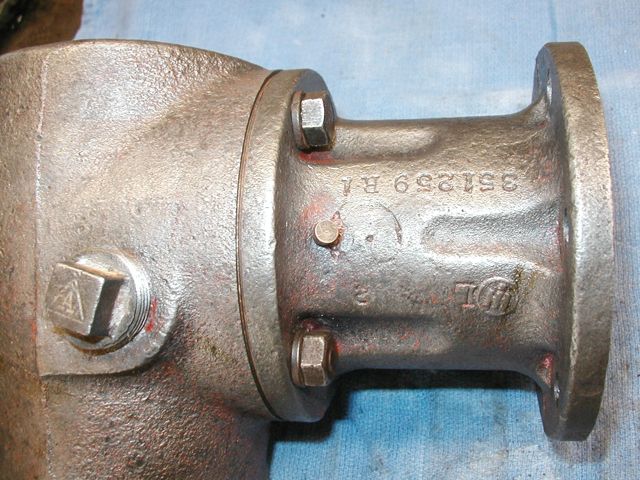
I then installed the belt pulley shaft spacer, seal retainer (with new seal), and gasket (note orientation of gasket) and torqued the capscrews to 20ft/lbs.
The last step was installation of the expansion plug. I reused the original as it was in good shape and rather robust ( approx. 1/8" thick) I used Permatex type 1 hard setting gasket sealer around the edge of the expansion plug and the groove in the housing. I used a large hammer to seat the plug.
I used the GSS-1411 service manual as my source document. I was able to reuse all parts except the oil seals and o-ring. Reassembly steps may vary from the GSS-1411.
Tools used:
Shop press
Bearing race and seal installer
Torque wrench
Screwdriver
Hammer.
Materials:
National Oil Seal 471765
National Oil Seal 441319
O-Ring 232
This site uses cookies to maintain login information on FarmallCub.Com. Click the X in the banner upper right corner to close this notice. For more information on our privacy policy, visit this link: Privacy Policy
NEW REGISTERED MEMBERS: Be sure to check your SPAM/JUNK folders for the activation email.
How to Rehab a Right Angle Drive Unit
Anything pertaining to these components will be found here.
-
- 10+ Years
- Posts: 3034
- Joined: Wed May 31, 2006 12:09 pm
- Zip Code: 74070
- Circle of Safety: Y
- Location: OK, Skiatook
How to Rehab a Right Angle Drive Unit
Postby Bill E Bob » Sun Dec 13, 2009 9:12 am
Return to “Differential, Final Drive, PTO and Brakes”
Jump to
- FarmallCub Site Information
- Forum Rules, Suggestions, Feedback & Information
- Member Spotlight
- Links Directory
- Sponsor Links
- TM Tractor Parts
- JP Tractor Salvage
- HamiltonBobsCubs
- Tractor Parts & Manuals
- PDF Manuals
- Best of H.L. Chauvin
- Binder Books
- Farmall Cub Forever
- Farmall Tractor Parts
- FarmallCub (dot) info
- Case IH
- Tractor Parts
- Burch Store Tractors
- Retro Row Crop
- Rebuilding & Restoration
- A&T Rebuilders
- Collector / Fan Sites
- Bigdog's Buckeye Cub Tug
- ATIS Cub FAQ #1
- ATIS Cub FAQ #2
- CubFest Photo Host
- ATIS
- Tractorfan IH Showcase
- Randell's Ranch Museum
- Only Cub Cadets
- Farmall Tractors in New Zealand
- Farmall H
- N Tractor Club
- National Agricultural Center and Hall of Fame
- Antique Powerland
- Tractor Data
- Wisconsin Historical Society
- Farm Supplies
- Best Farm Buys
- Buchheit
- Orscheln
- Tractor Publications
- Red Power
- Farm Show
- High Plains
- Auctions
- Webstore
- Auction Zip
- Friends of FarmallCub.Com
- The Wilderness Library
- Buford's Barn Cars
- IH Collectors
- National IH Collectors Club
- #1 Missouri
- #3 Kansas
- #4 Wisconsin
- #5 Iowa
- #6 Ohio
- #7 Indiana
- #8 Southeastern Pennsylvania
- #9 Tennessee
- #11 Michigan
- #14 California
- #15 Minnesota
- #16 Western Pennsylvania
- #17 Central Pennsylvania
- #18 New England
- #20 Ontario Canada
- #21 South Dakota
- #22 Sweden
- #23 Alabama
- #24 Kentucky
- #25 Texas
- #27 Florida
- #29 Georgia
- #30 Northwest (WA/ID/OR)
- #31 Louisiana
- #32 Southern Illinois
- #33 Northern Indiana
- #34 Western Pennsylvania
- #35 New York
- #37 Eastern North Carolina
- #38 Western Canada
- #39 Maryland
- #41 Virginia
- #42 North Carolina
- #43 Appalachian Mountain Region of North Carolina
- #44 Mississippi
- #45 United Kingdom
- Tractors
- Farmall Cub
- Cub Cadet
- Lo-Boy Series - 154, 184, 185
- Farmall A, Super A, AV, 100, 130 & 140
- Farmall C, Super C, 200 & 230
- Farmall H, HV, Super H, 300 & 350
- Farmall, IH, Case, Tractors - B's, F's, M's, Regulars, etc.
- Farmall B & BN
- Farmall F-xx Series
- Farmall M, Super M, 400, 450, & 560
- Farmall Regular
- Farmall / IH / CASE
- Other Tractors and Machinery
- CubFest and Tractor Show Announcements & Discussions
- Tractor Pride Photo Forum
- Farmall Cubs Photos
- Lo-Boys Photos
- Cadets Photos
- Tractors (non-Cub/Lo-Boy/Cadet) Photos
- CubFest Photos
- Cubarama Photos
- Proud of my other toys/tools Photos
- Tractor Show Photos
- Introduce Yourself
- The VINE Classifieds
- TM Tractor Parts
- JP Tractor Salvage
- HamiltonBobsCubs
- The VINE
- Cub Express Requests
- Rural and City Life
- How To Forum
- Cub Book of Knowledge
- Video How To's
- Cooling
- Fuel
- Ignition/Electrical
- Engine, Clutch, Transmission and Hydraulics
- Differential, Final Drive, PTO and Brakes
- Steering, Tires/Wheels and Weights
- Specialty tools
- Frame/Sheet Metal
- Paint
- Implements
- Shop Tips
- Miscellaneous Ideas
- Using The Forum
- Projects Forum
- Sharing with Friends and Family
- Member & Spouse Pictures
- Family & Friends Memorial Forum
- Pet Memorial Forum
- Farm Life and Better Half Forum
- Safety Forum
- Manuals
- Cub Stories
- Collector's Show & Tell
- Other Stuff
- Off Topic
- Cubber's say the funniest things
- Wazzits?
- Tool Talk and Reviews
- Message Board & Computer Questions
- Testing Forum (sandbox)
Who is online
Users browsing this forum: No registered users and 1 guest
- Board index
- All times are UTC-05:00
- Forum Icon Legend
- Delete all board cookies
- Site Policy & Privacy
- About
- The team
Powered by phpBB® Forum Software © phpBB Limited