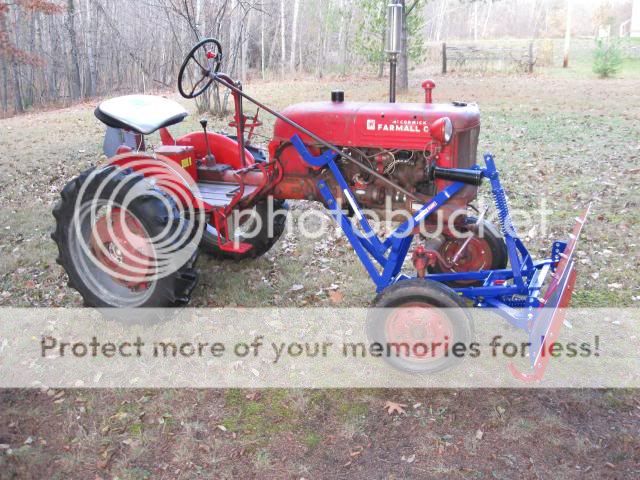
Re-Done 54-A blade, maybe it will scare away the snow.
Posted: Sun Nov 10, 2013 8:10 pm
From the time that I had gotten the Cub, I was never happy with the Leveling and Grading blade that had come with it. At some point long ago, it had been damaged and bent/torqued out of shape (quite severely). You could see where the snow extension on the top of the blade had hit the lifting arm and warped and bent it out of shape. I would assume that this was also what broke the lifting arm and did most all of the other damage. Needless to say it did not fit or hang correctly due to the damage/bends and what can at best be politely called repairs. I could have straightened and repaired the original but I chose to go a different route. I made the choice to start with a better specimen so, out with the old and in with the not-so-old.

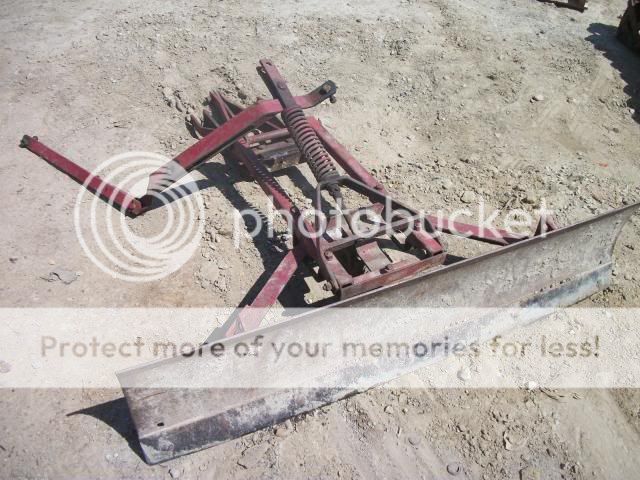
This new/old blade came from eBay. it came at a good price and was within a reasonable driving distance from home. It was nearly complete and any missing parts could be taken from the original blade or purchased elsewhere if I did not have them. The first thing was to disassemble the entire blade to see just exactly what was there and what needed to be fixed/repaired, replaced or acquired. The immediate pieces that were missing were the bellcrank extension, flexible clevis, skids and the snow extension, so four missing pieces. The skids and extension came from the original blade and the boomerang and clevis had to be bought, eBay for the bellcrank and a N.O.S. flexible clevis from the local Case/IH dealer.
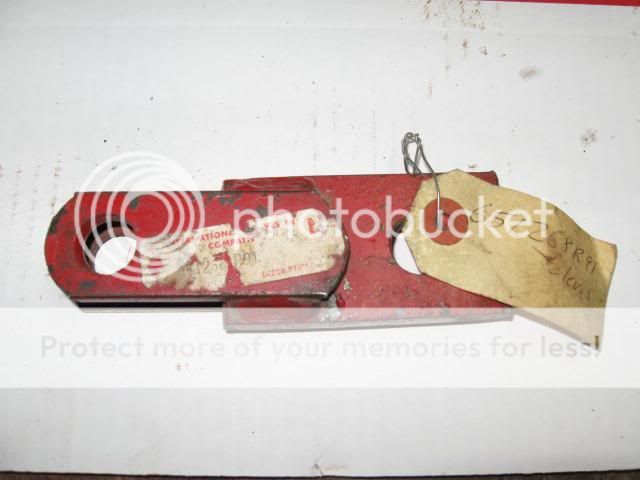
Surprisingly, most everything on the blade was in fairly good shape, the biggest problem being the lifting arm. At some point the bushing in the arm either wore out or fell out and was never replaced. You could see where they were running it without the bushing in place and the bolt had worn and oblonged the hole.

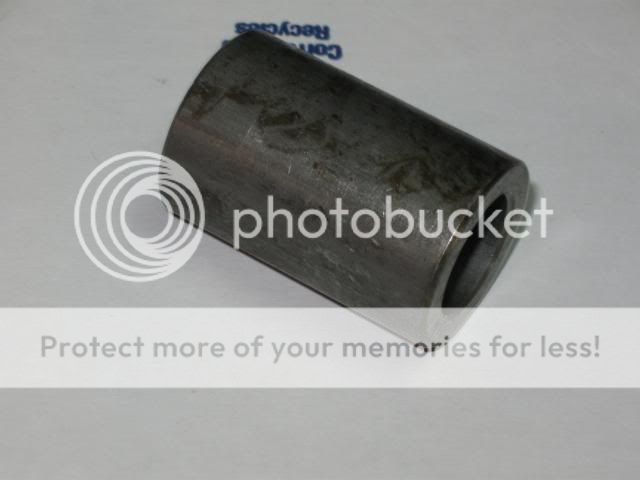
To fix this I bought some axle spacers that are used for mini-bikes and dirt-bikes. The spacers were 1.5” in length and 0.625” ID x 1.00” OD, the right length and ID but a larger outside diameter. The original bushing had an ID of 0.625” and an OD of 0.875” and stepping it up to 1.00” was not an issue because the hole had been worn and an original bushing would not have fit correctly. Once I got the spacers I measured the diameter just to be certain, not a true 1.00” (as advertised) but close enough at 0.995”. The arm was drilled out and then reamed for a press fit, this took about 20 minutes and the new bushing fit nice and tight. At $11.00 and free shipping for 4 of the spacers, I could not be happier the result and the price.
The next piece that had to be dealt with was the axle pivot (650132R1). Both ends of the rod were well worn and beaten down so a new axle pivot was in order. I got a 13.00” long piece of 1.00” diameter 303 stainless steel rod and cross-drilled holes for the cotter pins and then chamfered the ends. Quick and easy, no painting needed.

Aside from all of the bolts and pins needing to be replaced, there was only one other piece that needed any kind of repair. The blade support (650289R95) had been cracked and broken before and welded back together using the theory of “if some is good, more is better”, but in this case it was not. The repair was cracked right through the weld. I left this repair to the welding shop, and it turned out far better than I could have done.


A couple of other pieces had to be straightened slightly, but nothing major. The worst piece that needed to be straightened being the snow extension, which had come from the original blade. After a couple of hours of grinding to take down a lot of the welding flash and to radius most all of the edges and corners, all of the parts were starting to look a lot better. The next thing to do was to stamp each of the component pieces with their individual part numbers (pure overkill). At this point everything was loaded up and taken to the powdercoater for sandblasting and powdercoat.
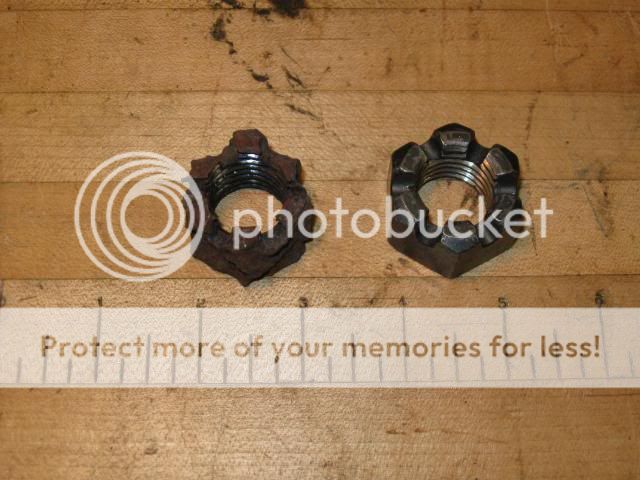
As I had mentioned above, almost all of the bolts and pins needed to be replaced. Whether they were worn, beaten up or just broke while trying to take everything apart, they all got replaced. Rather than just replace everything with regular machine bolts I used shoulder screws anywhere they could be used, and all other hardware that was used was stainless steel. Also, no lock washers were used, only ny-lock nuts. Why would I start to scratch up the nice fresh powdercaoting by using lock washers?

With some great help from Tim Talleur (tst) and the folks over at Maple-Hunter decals I was able to get all of the decals I wanted. I wasn’t worried about being correct with the decals, rather just getting the ones that I wanted. Once all of the decals were put on all that was left to be done was to put sub-assemblies together and then mount it to the Cub. I know that the blade should be either red, yellow or white but I liked the blue, but I did throw in some red accent pieces. All in all I think it turned out fairly well and with any luck I may have scared away the snow, at least for a little while.




This new/old blade came from eBay. it came at a good price and was within a reasonable driving distance from home. It was nearly complete and any missing parts could be taken from the original blade or purchased elsewhere if I did not have them. The first thing was to disassemble the entire blade to see just exactly what was there and what needed to be fixed/repaired, replaced or acquired. The immediate pieces that were missing were the bellcrank extension, flexible clevis, skids and the snow extension, so four missing pieces. The skids and extension came from the original blade and the boomerang and clevis had to be bought, eBay for the bellcrank and a N.O.S. flexible clevis from the local Case/IH dealer.

Surprisingly, most everything on the blade was in fairly good shape, the biggest problem being the lifting arm. At some point the bushing in the arm either wore out or fell out and was never replaced. You could see where they were running it without the bushing in place and the bolt had worn and oblonged the hole.

To fix this I bought some axle spacers that are used for mini-bikes and dirt-bikes. The spacers were 1.5” in length and 0.625” ID x 1.00” OD, the right length and ID but a larger outside diameter. The original bushing had an ID of 0.625” and an OD of 0.875” and stepping it up to 1.00” was not an issue because the hole had been worn and an original bushing would not have fit correctly. Once I got the spacers I measured the diameter just to be certain, not a true 1.00” (as advertised) but close enough at 0.995”. The arm was drilled out and then reamed for a press fit, this took about 20 minutes and the new bushing fit nice and tight. At $11.00 and free shipping for 4 of the spacers, I could not be happier the result and the price.

The next piece that had to be dealt with was the axle pivot (650132R1). Both ends of the rod were well worn and beaten down so a new axle pivot was in order. I got a 13.00” long piece of 1.00” diameter 303 stainless steel rod and cross-drilled holes for the cotter pins and then chamfered the ends. Quick and easy, no painting needed.

Aside from all of the bolts and pins needing to be replaced, there was only one other piece that needed any kind of repair. The blade support (650289R95) had been cracked and broken before and welded back together using the theory of “if some is good, more is better”, but in this case it was not. The repair was cracked right through the weld. I left this repair to the welding shop, and it turned out far better than I could have done.


A couple of other pieces had to be straightened slightly, but nothing major. The worst piece that needed to be straightened being the snow extension, which had come from the original blade. After a couple of hours of grinding to take down a lot of the welding flash and to radius most all of the edges and corners, all of the parts were starting to look a lot better. The next thing to do was to stamp each of the component pieces with their individual part numbers (pure overkill). At this point everything was loaded up and taken to the powdercoater for sandblasting and powdercoat.
As I had mentioned above, almost all of the bolts and pins needed to be replaced. Whether they were worn, beaten up or just broke while trying to take everything apart, they all got replaced. Rather than just replace everything with regular machine bolts I used shoulder screws anywhere they could be used, and all other hardware that was used was stainless steel. Also, no lock washers were used, only ny-lock nuts. Why would I start to scratch up the nice fresh powdercaoting by using lock washers?


With some great help from Tim Talleur (tst) and the folks over at Maple-Hunter decals I was able to get all of the decals I wanted. I wasn’t worried about being correct with the decals, rather just getting the ones that I wanted. Once all of the decals were put on all that was left to be done was to put sub-assemblies together and then mount it to the Cub. I know that the blade should be either red, yellow or white but I liked the blue, but I did throw in some red accent pieces. All in all I think it turned out fairly well and with any luck I may have scared away the snow, at least for a little while.


