Page 17 of 28
Re: My Restoration of Rex '48 - #21005
Posted: Tue Sep 10, 2013 2:46 pm
by danovercash
I better go check the kitchen cabinet, that's where I thought my coffee cup was, not visiting with your final!
Re: My Restoration of Rex '48 - #21005
Posted: Tue Sep 10, 2013 3:30 pm
by Bezirk
Good job, looks great, looking forward to meeting you at Cecil's.
Berlin
Re: My Restoration of Rex '48 - #21005
Posted: Tue Sep 10, 2013 5:00 pm
by PVF1799
Had a close call today - Read on for more details.
So A LONG TIME AGO in the CUB SHOP in my garage - I struggled to get the left brake rod out of the brake bushings. I got the left one out and started working on the right one - Being the bright lad I am - I used the left brake rod to push the right one out - which promptly stuck the left back in again - except now in 2 bushings instead of one. Got that out and straightened all the bushing supports out - OR SO I THOUGHT...
Upon Assembly of the seat platform today - what do you suppose was wrong? Yup, the left brake bushing was NOT lined up with the brake rod that came through the clutch shaft. So now I have this wonderfully painted platform - that I must have put a bend in when I was being silly with my press. So now it was back to the press - supported the platform carefully on both edges, used lots of cardboard to protect the paint and I'll be darned I got it straight......The left brake rod goes right in. One would assume that was the end of the story - Nope it's not - Guess what? The rod as a small bend in that causes it to bind when you move it through the braking arc.....I'm going to get the right fender on - so I know the platform is just were it belongs then I'll carefully straighten the left brake shaft. It's not off by much....Know I can get it right.....
So here's Rex as she sits right now......Waiting on seals and gaskets so I can get the left final drive on.
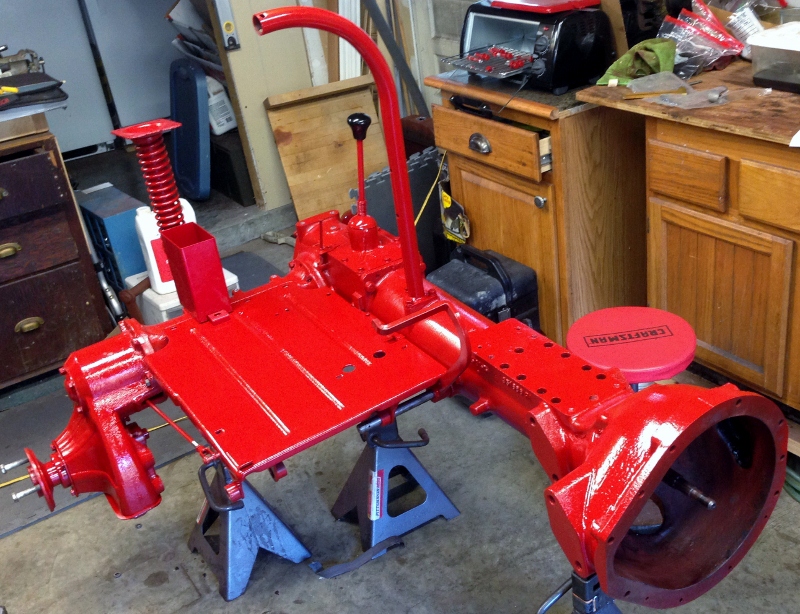
- Rex '48 is getting bigger....
- IMG_2677 (800x614).jpg (368.44 KiB) Viewed 430 times
Re: My Restoration of Rex '48 - #21005
Posted: Tue Sep 10, 2013 5:29 pm
by Cecil
Ken I have 4 coffee cans of I/H bolts if you want to get the correct ones. No dot heads but lots with I/H on them
Re: My Restoration of Rex '48 - #21005
Posted: Wed Sep 11, 2013 5:46 am
by pickerandsinger
PVF1799 wrote:artjh wrote:Ken, looks great!, I've been through this thread several times looking for info on your painting method. What kind of painting gun and are you using IH 2150? Can't wait to see the finished product. Thanks for any info .... art
IHfarmer wrote:I was wondering the same thing.
Rich
If ya'll promise not to laugh - I'll tell you how I've painted Rex and the reasons why. Promise?

Art et al, While I have a Campbell Hausfeld HVLP sprayer - I don't have the shop setup to use it. Believe it or not, I've done this whole job - one rattle can of IH 2150 Red at a time. Every nut, bolt, lock washer, spring, etc, has been individually sand blasted and painted by hand - one piece at a time.
I only have a single car shop to house everything for this job - tools, clean parts, blasting cabinet, tool box, benches - etc. It makes for quite a logistically planning process. I have made special wire hooks to hang all the parts for spraying outside and drying inside, a lazy susan painting stand and a bolt spray station.
Thanks all for following my post and asking your question.
Now stop laughing
Well, thats why I call you "Kenbrandt".....Your painting comes out like....mmmmmmm.....MAJIC...

...(Its really very well done)
Re: My Restoration of Rex '48 - #21005
Posted: Wed Sep 11, 2013 7:40 am
by PVF1799
A few small parts added in this morning, battery box and governor control lever. The governor control lever is waiting for the freshly sprayed cotter pin to dry, before I can put the outside washer on.
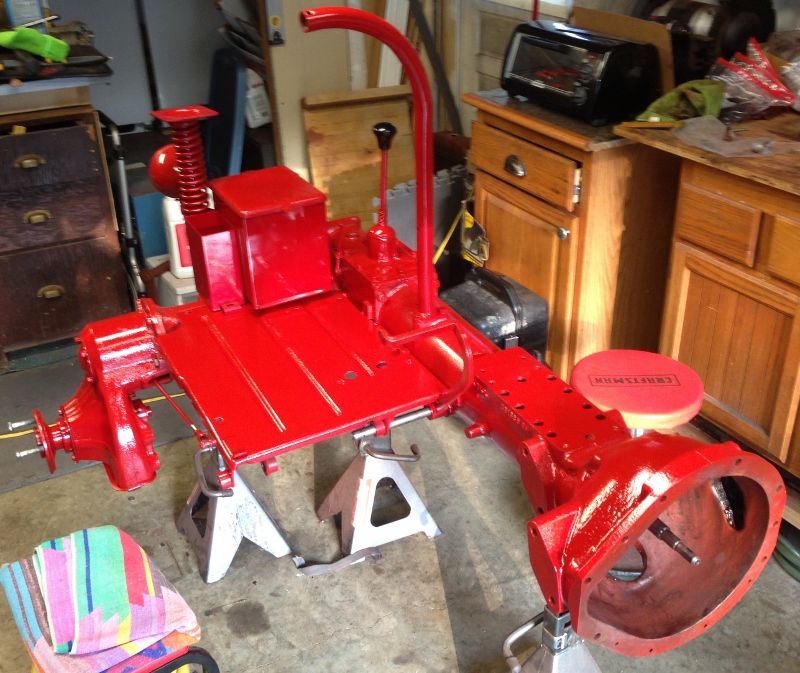
- Rex '48 1 9-11-2013 - God Bless America!
- IMG_2678 (800x673).jpg (379.47 KiB) Viewed 386 times

- Rex '48 2 9-11-2013 - God Bless America!
- IMG_2679 (800x727).jpg (344.14 KiB) Viewed 386 times
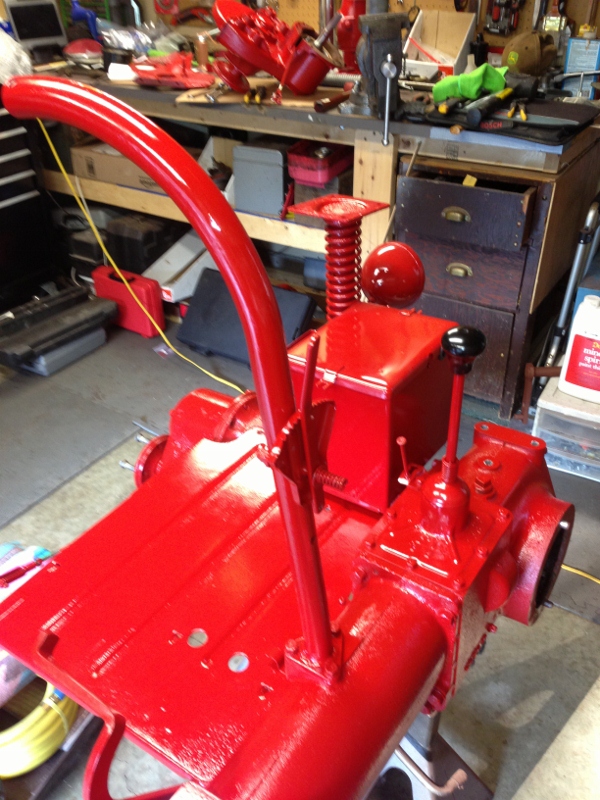
- Rex '48 3 9-11-2013 - God Bless America!
- IMG_2680 (600x800).jpg (322.05 KiB) Viewed 386 times
Tonight she'll get moved to the final assembly location as o-ring for the left final differential cover are in.
Ken
Re: My Restoration of Rex '48 - #21005
Posted: Wed Sep 11, 2013 8:07 am
by Jim Becker
PVF1799 wrote:Believe it or not, I've done this whole job - one rattle can of IH 2150 Red at a time.
How many cans are you up to? I've wondered how many it would take to get good coverage on a whole tractor.
Re: My Restoration of Rex '48 - #21005
Posted: Wed Sep 11, 2013 8:14 am
by PVF1799
Jim Becker wrote:PVF1799 wrote:Believe it or not, I've done this whole job - one rattle can of IH 2150 Red at a time.
How many cans are you up to? I've wondered how many it would take to get good coverage on a whole tractor.
PVF1799 wrote:Xperimental wrote:I have got to ask. How many cans of paint are needed to paint a Cub at this level? Thanks for sharing all the details and pictures. I have learned a lot from your posts about this project. The Cub looks wonderful.
It will be about 22-25 cans of IH 2150 Iron Guard Red and about 20 cans Primer. I'm keeping track, I'm publishing a spreadsheet when I am done for the all in parts and all.
Ken
Re: My Restoration of Rex '48 - #21005
Posted: Wed Sep 11, 2013 9:03 am
by PVF1799
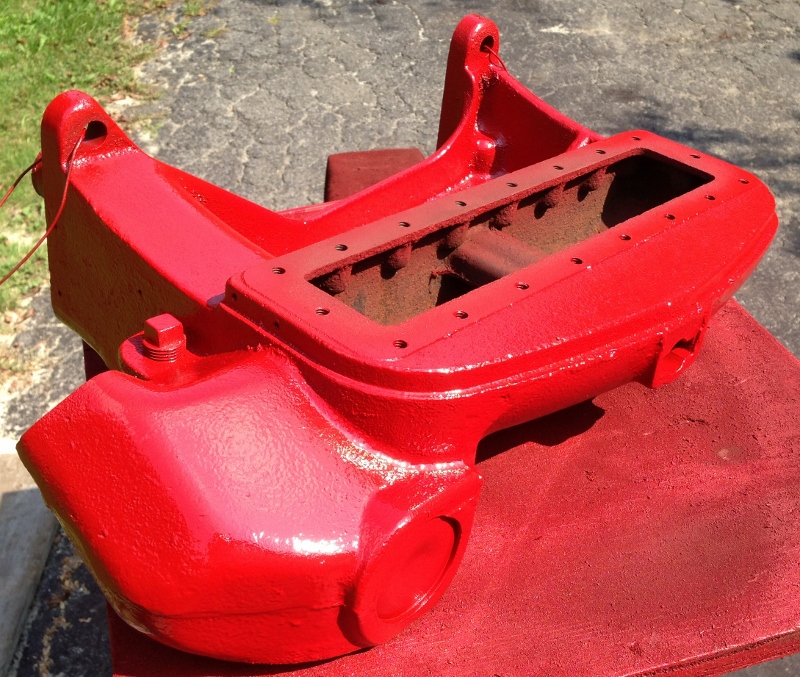
LAST BIG PART going IH 2150 Red today. First coat drying before the thunderstorms hit later today - the bottom will get it's final coat at 10:15 AM today...
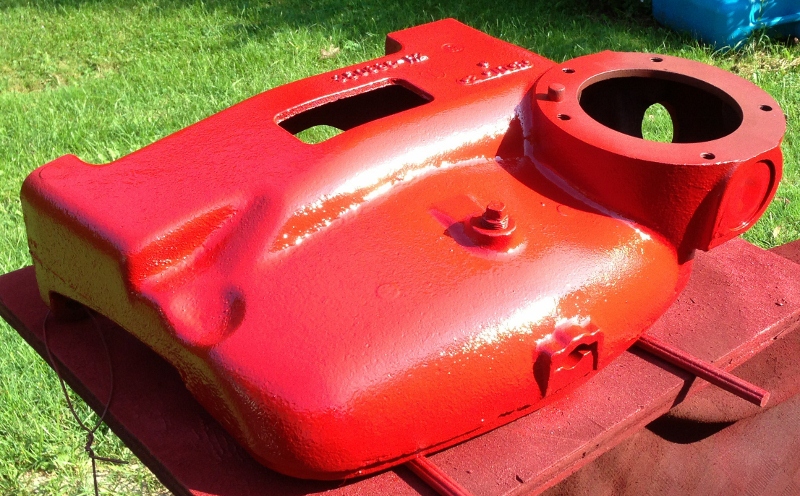
- Bolster Now with IH 2150 Red
- IMG_2681 (800x496).jpg (326.81 KiB) Viewed 369 times
Re: My Restoration of Rex '48 - #21005
Posted: Wed Sep 11, 2013 12:51 pm
by PVF1799
Pretty big day again - Everything is now on order.
Big orders to TM, Local Case IH Dealer and Brillman. Was going to build my own harness from RIWIRE, with the help of another forum member - but just won't have the time at NE CubFest as I can only attend on Saturday.
The engine block goes to Napa later this week or next at the latest.
Ken
Re: My Restoration of Rex '48 - #21005
Posted: Wed Sep 11, 2013 1:10 pm
by PVF1799
Turned over for top-side paint.
- Bolster Top Side 1
- IMG_2683 (800x677).jpg (417.67 KiB) Viewed 316 times
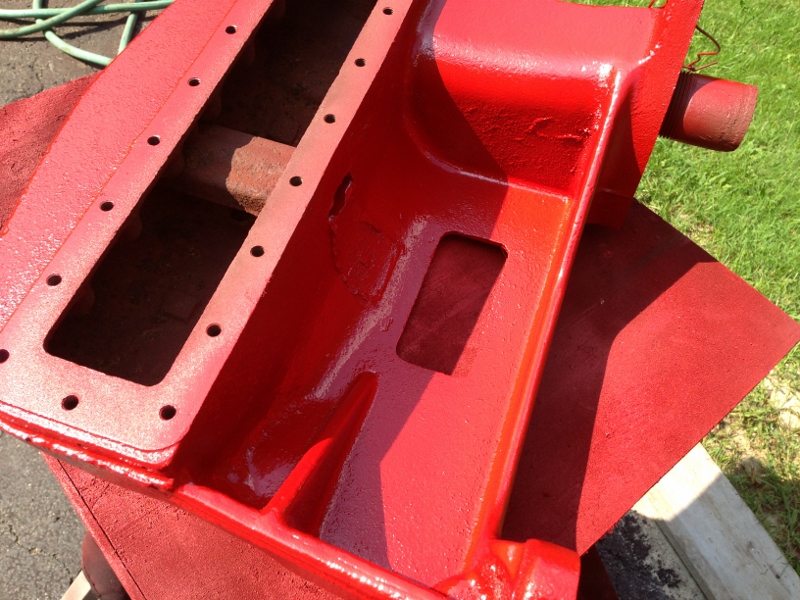
- Bolster Top Side 2
- IMG_2684 (800x600).jpg (336.52 KiB) Viewed 316 times
Re: My Restoration of Rex '48 - #21005
Posted: Wed Sep 11, 2013 7:21 pm
by PVF1799
Left Final Drive On.
Left Brake Rod - Ever so carefully straightened as to work perfectly now.
PTO - New Bearings and Seal Installed - Assembled and stored waiting for differential housing gaskets.
Governor Control Lever Installed.
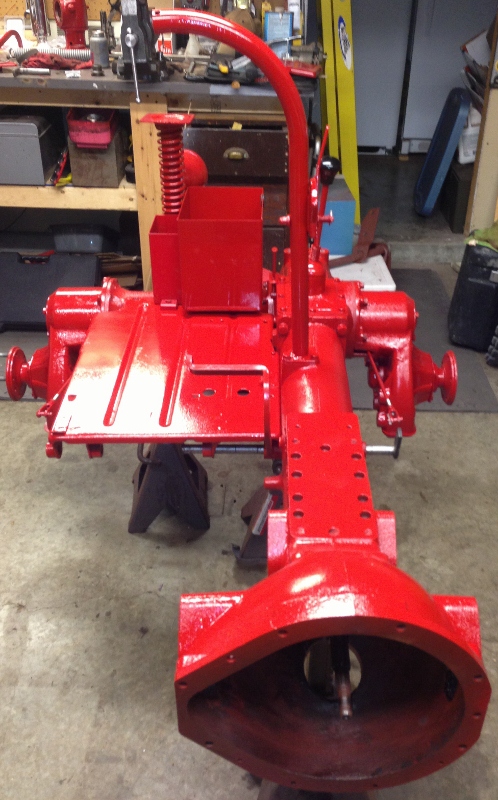
- Left Final Drive Installed
- IMG_2686 (498x800).jpg (272.03 KiB) Viewed 280 times
Re: My Restoration of Rex '48 - #21005
Posted: Thu Sep 12, 2013 8:44 am
by Denny Clayton
PVF1799 wrote:The engine block goes to Napa later this week or next at the latest.
Ken
I'm surprised you didn't send the block to NAPA ages ago. You'd have it back and ready to bolt in now while you're in assemby mode.
Re: My Restoration of Rex '48 - #21005
Posted: Thu Sep 12, 2013 9:25 am
by PVF1799
I agree - but way early on I lamented for a long time on how to get the head bolt out of the block with a not so easy-out stuck in the middle of it. I got that out - then the helicoil in. Then there was the decision on how much to have Napa do....Oh and then there was the money balancing issue.....Ideally what you proposed would have been perfect....All part of the learning curve.
Ken
Re: My Restoration of Rex '48 - #21005
Posted: Thu Sep 12, 2013 9:34 am
by Groove Critter
I have been reading this thread almost daily and I continue to be impressed with what I see. Excellent work! I can't wait to see this NEW 48 finished.
Dave
ps Engine block decisions should be deliberated over