Page 14 of 28
Re: My Restoration of Rex '48 - #21005 - Front Spindle
Posted: Tue Aug 20, 2013 6:40 pm
by PVF1799
Hi All - I put into practice a couple of the items from
this Bearing Installation Thread.
First, I used very fine sandpaper on the spindle until the bearing would start by hand onto the shaft. Next I heated the bearing in motor oil to 250F, picked it out with needle nose pliers and after a few light taps it looked like this.
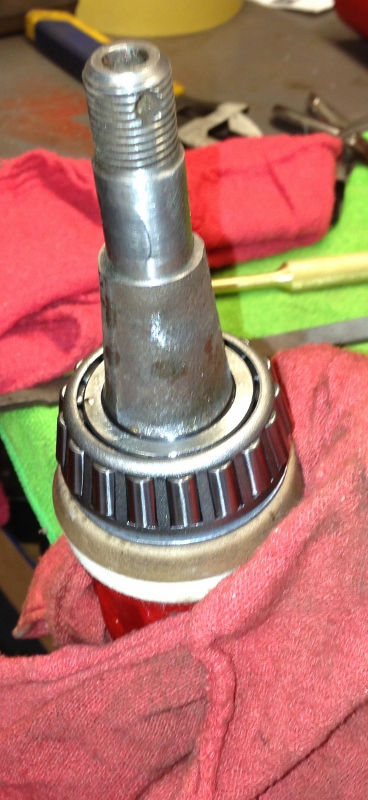
- Seals and Inner Bearing Installed
- IMG_2534 (368x800).jpg (207.19 KiB) Viewed 532 times
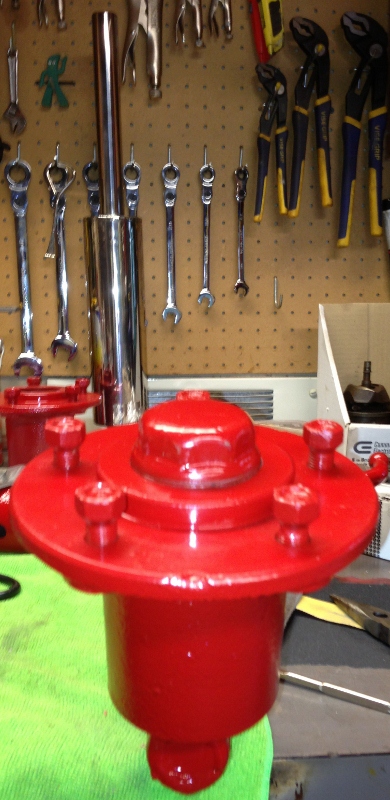
The rest of the assembly went easy - Something totally put back together.


- Finished 1
- IMG_2535 (456x800).jpg (230.45 KiB) Viewed 532 times
- Finished 2
- IMG_2536 (390x800).jpg (217.84 KiB) Viewed 532 times
Re: My Restoration of Rex '48 - #21005 - Front Axles Done
Posted: Tue Aug 20, 2013 8:44 pm
by PVF1799
I decided to get at the other side tonight. I also took the oil up to 285F and just like predicted the bearing pretty much fell onto the shaft. I reached for the brass punch and hammer, to see the bearing seated properly. Less than 2 minutes later you'd have needed a bearing puller to get it off. Amazing - Thanks Guys.
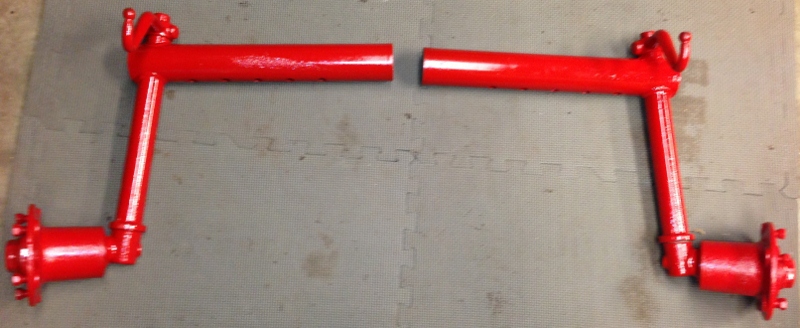
- More Parts Ready for Assembly
- IMG_2537 (800x328).jpg (155.5 KiB) Viewed 517 times
Re: My Restoration of Rex '48 - #21005 - New Seat
Posted: Wed Aug 21, 2013 1:25 pm
by PVF1799
Hi All - The big day is here. The new seat arrived. I actually unpacked it right in the middle of a conference call.....Could not wait another moment. Darrell did an awesome job. Another fine recommendation from this forum. Thanks all.
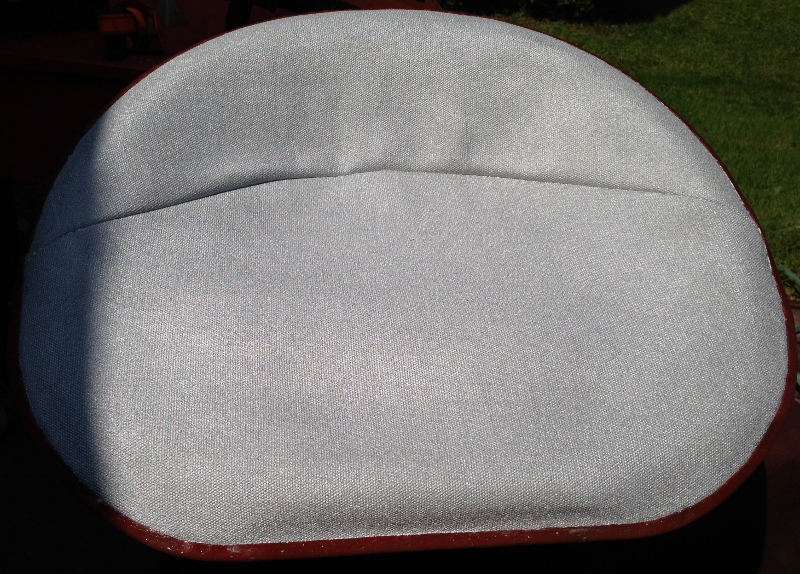
- Refurbished Seat 1
- IMG_2538 (800x574).jpg (368.81 KiB) Viewed 488 times
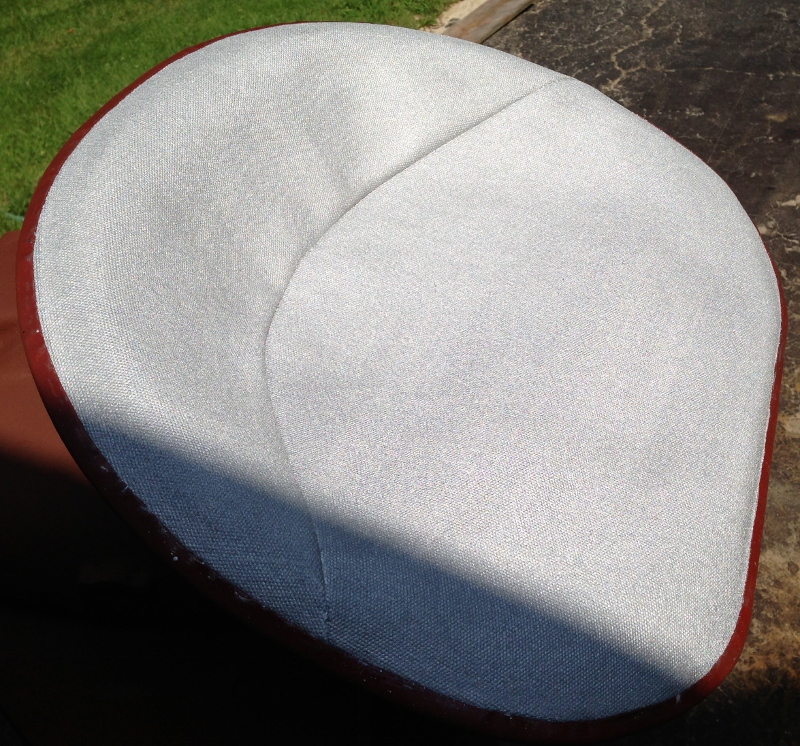
- Refurbished Seat 2
- IMG_2539 (800x746).jpg (436.48 KiB) Viewed 488 times
Re: My Restoration of Rex '48 - #21005
Posted: Wed Aug 21, 2013 7:05 pm
by PVF1799
Making progress each day.
Heating bearings in oil worked so well I decided to try it on these also. Much to be excitement - both large bearings fell right on. Metal to metal just by dropping it down the shaft. Tapped it with the brass punch just to be sure - but it was right solid.
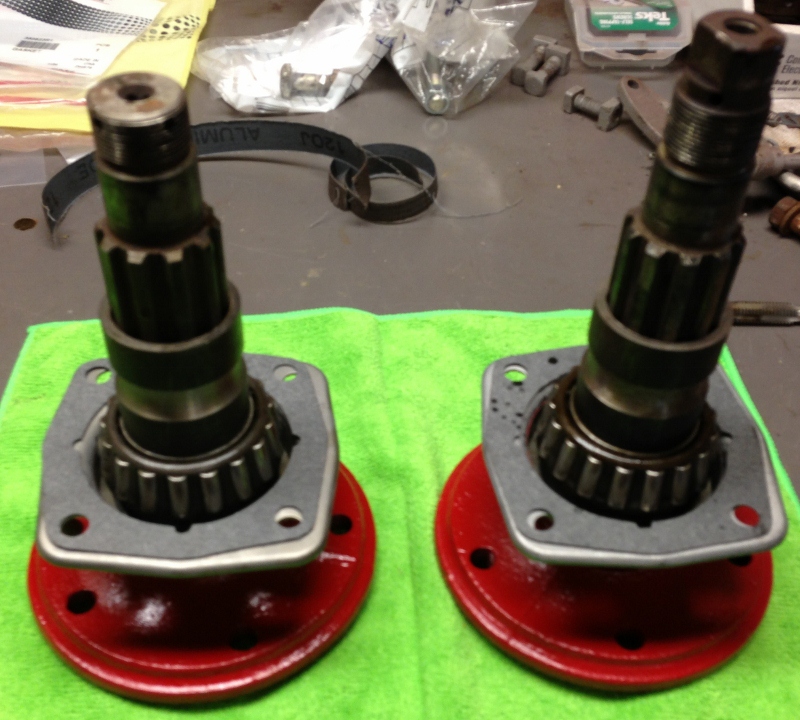
- Final Drive Large Bearings
- IMG_2541 (800x720).jpg (298.33 KiB) Viewed 463 times
This one was heated also - but because I forgot to clean the shaft with sandpaper it needed a few light taps with the brass punch.
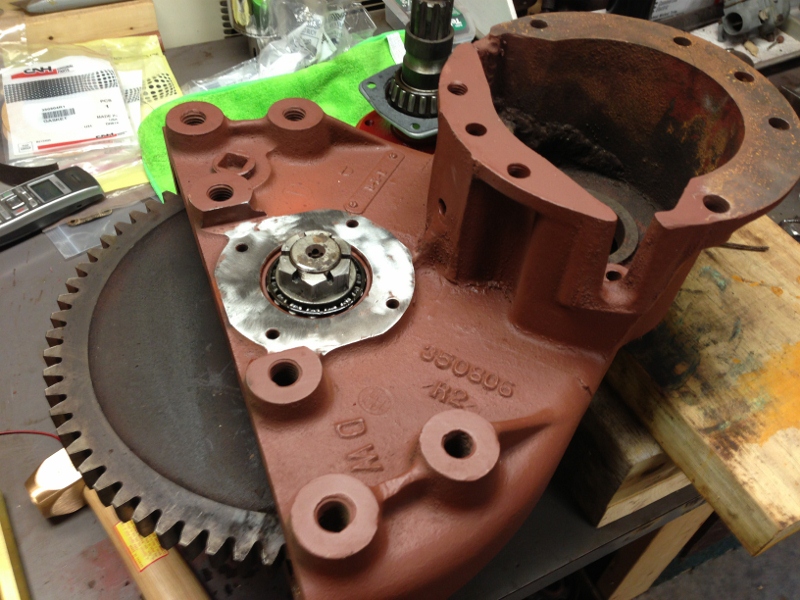
- Top Bearing Installed
- IMG_2544 (800x600).jpg (285.4 KiB) Viewed 463 times
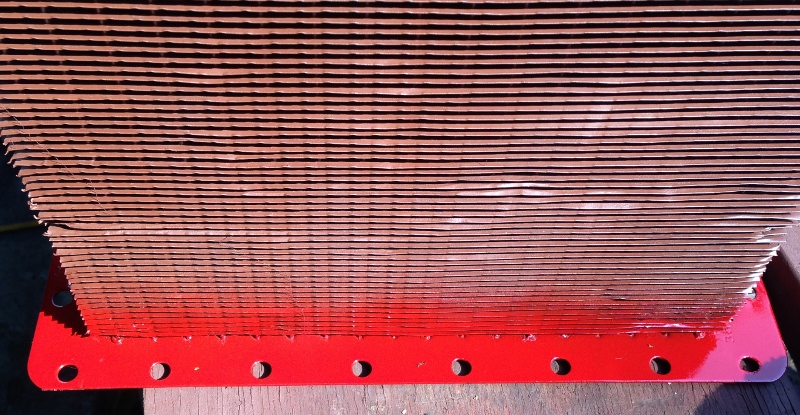
The radiator has been cleaned to the point of being a bit silly...It's now primed for painting.
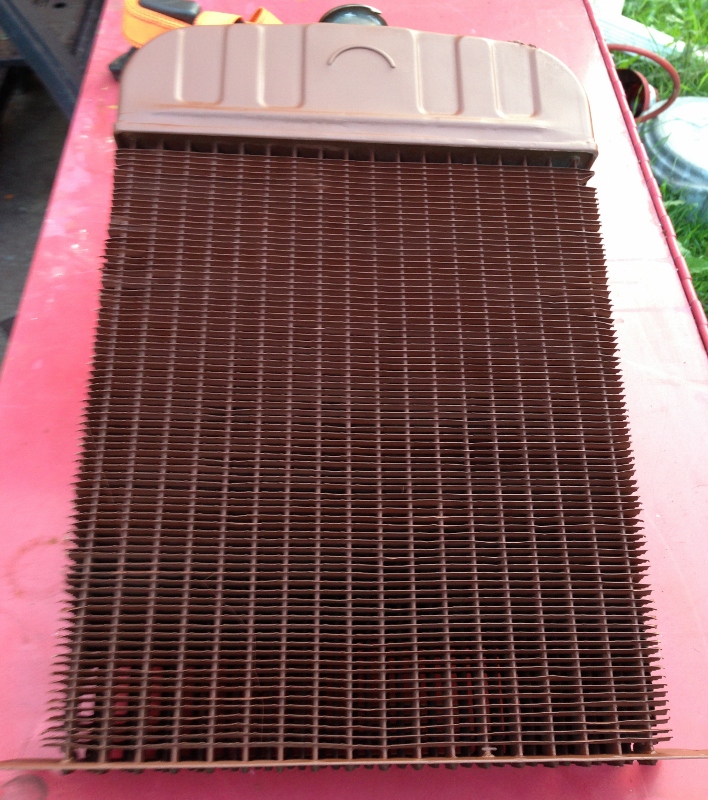
- Radiator Primed
- IMG_2543 (708x800).jpg (403.59 KiB) Viewed 463 times
Re: My Restoration of Rex '48 - #21005
Posted: Wed Aug 21, 2013 9:28 pm
by Hengy
Love watching this thread! You are going all out on this!!
Re: My Restoration of Rex '48 - #21005
Posted: Thu Aug 22, 2013 6:18 am
by Smokeycub
Hengy wrote:Love watching this thread! You are going all out on this!!
No doubt! He'll have the "newest" ol' Cub out there. Ken, you are really gettin' after it! It's good to see someone so excited about their project, you and your Dad I suspect. Plus it's a heirloom of sorts, that makes it extra special. Lookin' good man, lookin' good!

P.S. No stone ... er - uh - bolt unturned!

Re: My Restoration of Rex '48 - #21005
Posted: Thu Aug 22, 2013 7:34 am
by Donegal Cub
Amen to all the previous posts,

That is going to be the best of the best

I follow your progress relentlessly

Bernard.
Donegal Cub.
Re: My Restoration of Rex '48 - #21005
Posted: Thu Aug 22, 2013 9:45 am
by PVF1799
In my quest to finish the left final drive - I did the frantic search for the upper bearing. Was pretty careful during disassembly to mark all, but I wasn't the only person tearing Rex apart. After a bit of thought I found the parts required - Much to my amazement, I found more stuff to sand blast and prime. Wonder if any of you have put things away carefully only to search for them later?
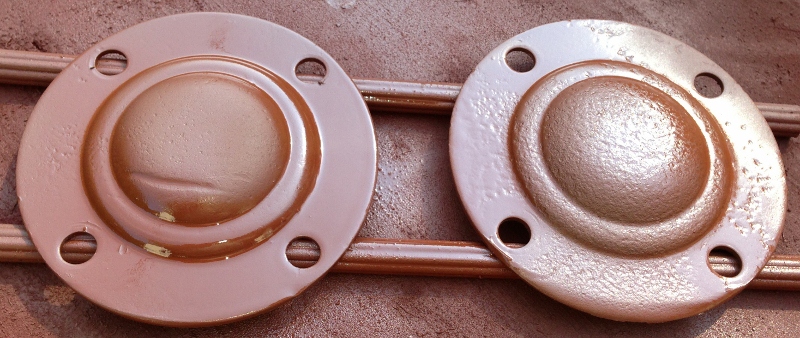
- Upper Final Drive Cover Plates - Primed and Drying
- IMG_2546 (800x338).jpg (222.35 KiB) Viewed 399 times
I painted this part of the radiator red - Once cured it will be masked off, so the balance of the radiator can be sprayed Satin Black. The Modine Mfg., tag has been cleaned and clear coated so it's readable. That will be brass color. I made a paste of copper/brass cleaner from the local super market to remove the tarnish before priming.
- Radiator Mounting Plate
- IMG_2547 (800x415).jpg (301.26 KiB) Viewed 399 times
Re: My Restoration of Rex '48 - #21005
Posted: Thu Aug 22, 2013 10:11 am
by kpaine
Ken,
Were the radiators originally black? I would think they would operate more efficiently without any paint on the fins.
Ken
Re: My Restoration of Rex '48 - #21005
Posted: Thu Aug 22, 2013 10:20 am
by PVF1799
kpaine wrote:Ken,
Were the radiators originally black? I would think they would operate more efficiently without any paint on the fins.
Ken
I've seen conflicting information on the color. I want mine to be satin black as my bit of personal flare to the restoration. According to sources I've researched a layer of paint does not impede the transfer of heat from the tubes to the fins as that's direct contact. Car radiators are painted black - so I figure I'm safe - even considering that they have a water pump - we'll see. Thanks for watching my posts and commenting.
Ken
Re: My Restoration of Rex '48 - #21005
Posted: Thu Aug 22, 2013 12:05 pm
by Mr E
[quote="PVF1799"] Wonder if any of you have put things away carefully only to search for them later?
Ken, I put a lot of stuff away carefully, only to search for it later. And search. And search.
Re: My Restoration of Rex '48 - #21005
Posted: Thu Aug 22, 2013 12:44 pm
by Jim Becker
kpaine wrote:Ken,
Were the radiators originally black? I would think they would operate more efficiently without any paint on the fins.
Ken
The original paint on the radiators was pretty thin, so not much of an effect either way.
The radiators came into the factory with black paint. After the tractor was assembled, the whole thing was painted red (or yellow or . . .). No masking was done to keep paint off the radiator so they typically have a lot of overspray and are mostly the color of the tractor. Early tractors had the grill in place when they were painted, so you can imagine the paint on the front of the radiator. If you find an original radiator, you can often see a back side that is mostly red with a big X shaped shadow from wherever the fan was positioned during painting.
Re: My Restoration of Rex '48 - #21005
Posted: Thu Aug 22, 2013 2:25 pm
by PVF1799
kpaine wrote:Ken,
Were the radiators originally black? I would think they would operate more efficiently without any paint on the fins.
Ken
I'm using this product to paint the radiator. The primer I applied was put on very thin as recommended
Re: My Restoration of Rex '48 - #21005
Posted: Thu Aug 22, 2013 5:27 pm
by Rob in NH
just out of curiosity, what kind of primer did you use on the radiator?
Re: My Restoration of Rex '48 - #21005
Posted: Thu Aug 22, 2013 5:42 pm
by PVF1799
Rob in NH wrote:just out of curiosity, what kind of primer did you use on the radiator?
Based on your question - probably the wrong one - Sent you a PM. I'll take it off if necessary.