This site uses cookies to maintain login information on FarmallCub.Com. Click the X in the banner upper right corner to close this notice. For more information on our privacy policy, visit this link:
Privacy Policy

NEW REGISTERED MEMBERS: Be sure to check your SPAM/JUNK folders for the activation email.

Sheetmetal Painting Advise

The Cub Club -- Questions and answers to all of your Cub related issues.
Forum rules
Notice: For sale and wanted posts are not allowed in this forum. Please use our free classifieds or one of our site sponsors for your tractor and parts needs.
lyle11
5+ Years
5+ Years
Posts: 497
Joined: Mon Nov 24, 2014 12:09 am
Zip Code: 44236
Tractors Owned: 48 FCub
55 Lowboy
60 Lowboy
Allis Chalmers B

Sheetmetal Painting Advise

Postby lyle11 » Sun Sep 08, 2019 2:33 pm

I am painting my third Cub hood. I’m a rattle can painter and far from being a perfectionist. My issue is that I probably should have totally stripped the old paint off but it wasn’t bad and was rust free and very tough to remove with a grinder with a cupped wire wheel, so I left some paint on the hood then used Bondo Glazing putty to smooth it out before I primed and painted it.

But, once the shiny paint went on it revealed imperfections. I suspect as I sand it I’m digging into the softer putty and creating small divots that become visible once the paint is applied. As I continue applying and sanding the putty it gets a little better with each coat. The entire tank and the hood sides, where I took it down to bare metal, look good. It’s the top of hood where I left some old paint that has the waviness.

I have been using a small palm sized sanding sponge to feather the glazing putty. I’m considering the following options:

1- Use a stripper and wire wheel on the top of the hood where it is wavy and take it to bare metal and start over on that area.

2 - Keep using the glazing putty with a larger stiffer sanding block and less pressure that doesn’t flex and dig into the softer putty.

Looking for any recommendations.

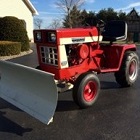
Here is a picture of what I am referring to.

Thanks


677B0CA0-A22F-4F03-8199-0DE9283D6FDB.jpeg
677B0CA0-A22F-4F03-8199-0DE9283D6FDB.jpeg (45.61 KiB) Viewed 967 times
Last edited by lyle11 on Sun Sep 08, 2019 11:13 pm, edited 1 time in total.

SPONSOR AD

Sponsor


Sponsor
 

User avatar
trekrider69
5+ Years
5+ Years
Posts: 49
Joined: Thu Mar 21, 2019 7:15 pm
Zip Code: 47240
Tractors Owned: 1972 CC149 “66 clone”
1970 JD110
1947 fCub w/ C3 mower
Circle of Safety: Y
Location: SE Indiana

Re: Sheetmetal Painting Advise

Postby trekrider69 » Sun Sep 08, 2019 7:37 pm

I am not an expert on painting on any account, but I know prep work is extremely important for the final spray to look good. I do lots of sanding with 100 and 220 grit sandpaper and feel for the feathering of painted to bare metal interface. I then use primer to cover everything. That should show you any places that will show once the color is sprayed on. I then wet sand with 1500 or 1600 grit. Wash and dry. Then I spray the color if everything looks good with wet-sanded primer. I always want my projects to look their best, but I know there will always be places I should have spent more time on.
Circle of Safety
KB9CIY

brewzalot
5+ Years
5+ Years
Posts: 441
Joined: Sat Jul 12, 2014 10:10 pm
Zip Code: 53105
Tractors Owned: '57 cub Loboy
'61 cub
Circle of Safety: Y
Location: Wisconsin, Burlington

Re: Sheetmetal Painting Advise

Postby brewzalot » Sun Sep 08, 2019 8:37 pm

Rattle can painting puts down such a thin layer it takes a long time to build up a layer as thick as the original. On my hood, I started by brushing on 2-3 coats of paint, sanding in between . Then once I had the build up I wanted I finished up with several coats of the rattle can paint and then clear coat. Not sure if this is a good practice but it worked well for me and it turned out real nice.

tim

Rob in NH
10+ Years
10+ Years
Posts: 2729
Joined: Sun Oct 03, 2004 7:11 am
Zip Code: 03848
eBay ID: panelbeata
Tractors Owned: 1947 circle cub
1950 cub demonstrator
1957 cub
1967 cub
Circle of Safety: Y
Location: NH, Kingston
Contact:

Re: Sheetmetal Painting Advise

Postby Rob in NH » Sun Sep 08, 2019 8:50 pm

Strip and start over, even if you reprime and block it out the primer will shrink and look like what you have.
Image

bauerei
Posts: 34
Joined: Mon Jun 17, 2019 8:26 am
Zip Code: 19610
Tractors Owned: 1955 Farmall Cub

Re: Sheetmetal Painting Advise

Postby bauerei » Sun Sep 08, 2019 10:15 pm

I agree with stripping and starting over.

I've used the orange-smelling paint stripper from the big box stores with great success. The factory original paint comes off a few minutes after putting the paint stripper on. I usually reapply to problem areas and only use the wire wheel at the very end to get off the really tough spots.
Mol ee Daag kumm ich zu die nei Bauerei...

lyle11
5+ Years
5+ Years
Posts: 497
Joined: Mon Nov 24, 2014 12:09 am
Zip Code: 44236
Tractors Owned: 48 FCub
55 Lowboy
60 Lowboy
Allis Chalmers B

Re: Sheetmetal Painting Advise

Postby lyle11 » Sun Sep 08, 2019 11:18 pm

Thanks. I’m gonna strip the top of the hood and start over. I also like the Citristrip orange stripper. It works good and doesn’t smell bad like the other stuff.

Scrivet
10+ Years
10+ Years
Posts: 2929
Joined: Sun Apr 19, 2009 9:51 pm
Zip Code: 63664
Location: MO, Potosi

Re: Sheetmetal Painting Advise

Postby Scrivet » Sun Sep 15, 2019 6:15 pm

lyle11 wrote:.............. I’m a rattle can painter and far from being a perfectionist..............
Then what I would do is stand farther back to look at it. :D

Seriously, I think if you're noticing it now you'll never be satisfied leaving it that way. Starting over sounds like the best idea and probably you'll end up spending less time than doing patch work on it.

lyle11
5+ Years
5+ Years
Posts: 497
Joined: Mon Nov 24, 2014 12:09 am
Zip Code: 44236
Tractors Owned: 48 FCub
55 Lowboy
60 Lowboy
Allis Chalmers B

Re: Sheetmetal Painting Advise

Postby lyle11 » Tue Sep 17, 2019 9:53 pm

I used CitriStrip on the top of the hood followed by a wire wheel and took it down to bare metal. Painted it and I’m really glad I started over. Now I only have to use glazing putty to smooth out a dent I repaired using a C-Clamp rather than fix poor preparation.

DickB
10+ Years
10+ Years
Posts: 484
Joined: Sun Aug 05, 2012 7:01 am
Zip Code: 00000
Tractors Owned: 1955 Cub Fast Hitch
sickle bar
land plow
harrows
snow plow
manure spreader
hayrake, rope pull
variety of cultivators
Wagner WM-1 bucket loader
rear carrier -- homemade
Location: Berkshire hills

Re: Sheetmetal Painting Advise

Postby DickB » Wed Sep 18, 2019 8:36 am

When I went to repaint, first thing was to ask neighbor how he did such a nice job on his tractor. Ans: paint brush. Then asking the local expert on "how to" without a spraying setup he said: Sand down as much as you can, then brush on heavy rust primer from Rustoleum, sand lightly, put on 2nd coat of this; then sand lightly again; then brush on several coats of IH Ironclad red with sanding between the two coats. Standing back of course helps but the heavier paints seem to hide lots of imperfections.

halftonstude
5+ Years
5+ Years
Posts: 157
Joined: Sun Sep 30, 2018 3:09 pm
Zip Code: 06482
Circle of Safety: Y

Re: Sheetmetal Painting Advise

Postby halftonstude » Sun Sep 22, 2019 3:26 pm

I use Dad's Easy Spray chemical stripper. takes off everything. have to wash it really clean before you start anything else after stripping. then I clean the surface with lacquer thinner to remove any oils or residue. boddy filler, i use Bondo i love the smell lol. if you're looking for fantastic finishes you'll need two colors of primer, then when you sand the high spots show the first coat. But this isn't a deusenberg it's a farmall... i've both shot and rattle canned my 52. fenders, hood, engine, torque tube the big stuff with my hvlp gun and the small items like distributor, wire clips, governor i did with a rattle can. i used 1 coat sandable primer, and use multiple grades of paper. sand paper only removes the marks from the previous sand paper. if you start with 220 the 400 grit will only remove the marks from the 220. you'll need 800 to get rid of the marks from the 400, 1100 to remove the marks from the 800 etc. i got a fine finish only going down to wet 400 and i'm pleased with the results. like i said it's not a deusenberg it's a farmall.
c


Return to “Farmall Cub”

Who is online

Users browsing this forum: No registered users and 40 guests